
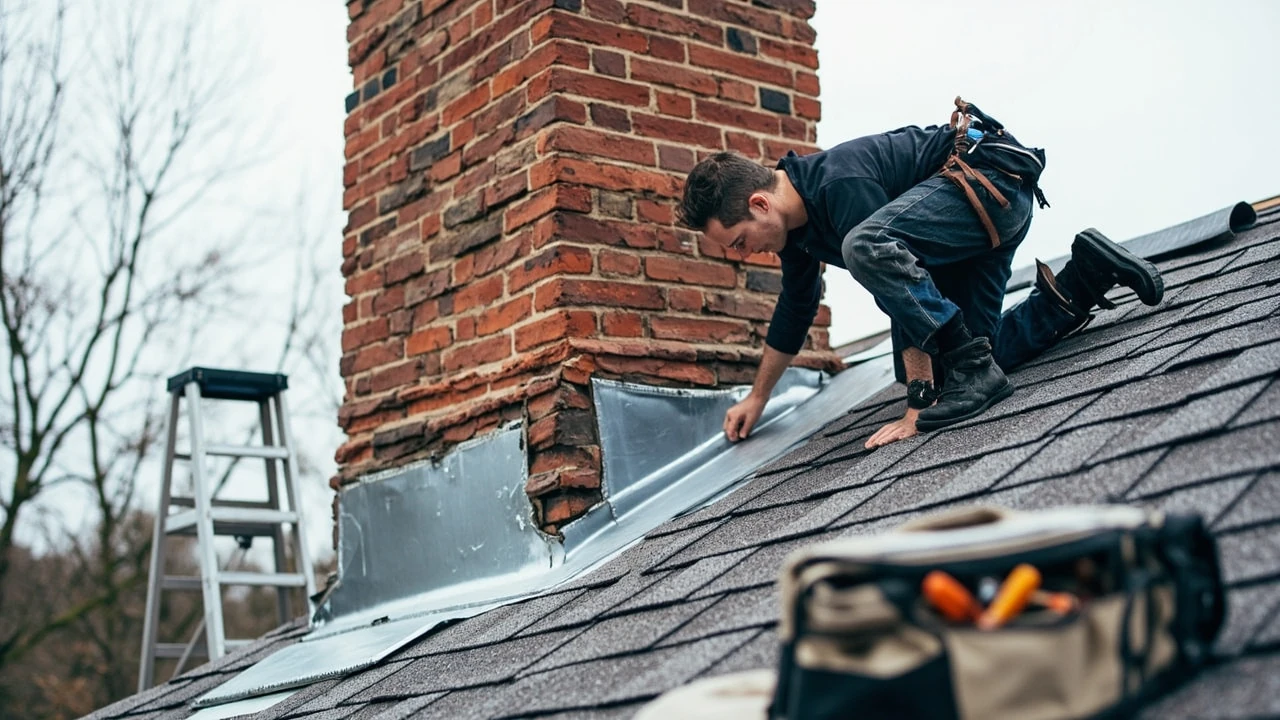
Chimney flashing repair: what to do before water finds the joint
A brown stain the size of a dinner plate creeps across the ceiling above the fireplace. The plaster feels dry, the roof looks fine from the driveway, and the chimney itself is still standing. The most common culprit in that exact scene is not the shingles and not the chimney crown. It is the thin layer of metal where the chimney meets the roof, and the fix is a specific trade skill called chimney flashing repair.
Flashing is the most failure-prone seam on a typical pitched roof, because it joins two structures that move independently. The chimney is masonry, heavy, and slow to react to temperature. The roof deck and sheathing flex with wind, snow load, and seasonal humidity. Any seal between them has to absorb that movement for decades without tearing, rusting through, or pulling away. When it fails, water travels along rafters and insulation before it shows up as a stain, which is why a small-looking ceiling mark often hides a much larger problem.
This guide covers what chimney flashing actually is, how to recognize a real flashing problem versus other roof leaks, what proper repair looks like, the realistic 2026 cost range, when a homeowner can safely handle a temporary patch, and how to evaluate a contractor before signing an estimate. It is written for a homeowner or property manager who needs to make a clear decision, not for a roofer looking for a technical manual.
What chimney flashing actually is
Chimney flashing is a system of overlapping metal pieces that seal the gap between the chimney and the surrounding roof. It is not a single strip of metal, and it is not caulk. The flashing system is made up of several layers, each with a different job.
- Base flashing. L-shaped pieces of metal that sit flat on the roof deck and turn up against the chimney. Each course of flashing is stepped into a mortar joint in the brickwork.
- Step flashing. Rectangular pieces woven between each course of shingles as the roof climbs the upslope side of the chimney. Each piece overlaps the one below so water runs down and out, not sideways into the seam.
- Counter flashing. A second layer of metal that is let into a reglet (a shallow cut) in the chimney mortar joint and folded down over the top of the base flashing. This covers the top edge so wind-driven rain cannot get behind it.
- Apron flashing. A single flat piece on the downslope side of the chimney, which routes water out onto the shingles below.
- Cricket or saddle. A small peaked diverter installed on the upslope side of any wide chimney (generally 30 inches or wider). It splits water and debris around the chimney instead of letting a pond form behind it.
The metal itself is usually one of three materials, and the choice matters for both lifespan and price.
Common flashing materials and how they age
| Material | Typical lifespan | Strengths | Weak points |
|---|---|---|---|
| Galvanized steel | 15 to 25 years | Lowest cost, widely available, easy to solder or seal | Coating wears off, then rusts through at seams first |
| Aluminum | 20 to 30 years | Lightweight, does not rust, easy to bend on site | Soft, dents from hail or foot traffic; reacts with alkaline masonry if in direct contact |
| PVC or plastic coated | 10 to 20 years | Inexpensive, paintable | Becomes brittle in cold, UV degrades the surface, hard to repair in patches |
| Copper | 50 to 80+ years | Longest service life, ages to a protective patina, soft enough to shape but strong | Highest material cost; theft risk on unattended job sites in some areas |
| Stainless steel | 40 to 60 years | Excellent corrosion resistance, holds shape in storms | Premium cost; needs compatible fasteners to avoid galvanic reaction |
The material alone does not decide how long flashing lasts. Installation quality and the choice of sealant matter just as much. A skilled copper flashing job that is improperly nailed or sealed will fail faster than a careful galvanized steel job.
Why chimney flashing fails
Flashing does not usually fail all at once. It ages in predictable ways, and knowing the pattern helps you read what is happening on your own roof before you call anyone.
- Movement fatigue. Each year the chimney expands in summer heat and contracts in winter cold. The flashing flexes with it. Over time the metal work-hardens, and small cracks open along the bend lines, especially on the upslope corners.
- Mortar joint separation. Counter flashing is anchored into a reglet cut into the chimney mortar. If the mortar was soft, the reglet edge can crumble and the counter flashing loosens.
- Sealant dependency. Many older flashing jobs rely heavily on roofing tar or polyurethane caulk to do the work the metal should be doing. Sealant hardens, cracks, and pulls away within 5 to 10 years, while the metal is still sound.
- Corrosion at the seams.
- Storm and impact damage. Lifted shingles, fallen branches, or hail can dent or dislodge flashing, especially the soft aluminum kind.
- Roofing work gone wrong. A new shingle roof installed without re-flashing the chimney is a very common cause of early leaks. Roofers sometimes reuse old flashing to save a few hundred dollars, then the leak shows up within a season.
- Missing or undersized cricket. A wide chimney without a proper saddle collects snow and leaves. Standing water and debris accelerate every other failure mode.
Lap joints and fastener penetrations are the first places to rust on galvanized or coated steel.
Most flashing problems on a 15 to 30 year old home are a combination of two or three of these. A repair visit that only reseals the surface without addressing the underlying movement will fail again within a few years.
How to tell whether the leak is really the flashing
Chimney leaks are often misdiagnosed. Water that enters around the chimney can come from the flashing, the crown, the mortar joints, the cap, or even condensation inside the flue. A few simple checks narrow the field before you climb a ladder.
- Stain pattern. A flashing leak usually shows as a stain on the ceiling a few feet away from the chimney, often along a ceiling joist that runs toward the chimney. A crown or cap leak tends to wet the masonry itself and may drip down the inside of the firebox.
- Timing. Flashing leaks are worst during wind-driven rain, especially when the wind comes from the side of the chimney with the most flashing exposure. A leak that appears only during long, calm, freezing rain is more often a crown or cap issue.
- Visible daylight or staining. From the attic with a flashlight, look at the gap between the chimney and the sheathing. Water tracks often leave a dark line on the wood, even after the leak has dried.
- Exterior inspection from the ground. Binoculars help. Look for lifted metal, rust streaks on the shingles below the chimney, mortar that has fallen out of the counter flashing reglet, or shingles that are missing right at the chimney corner.
- Hose test, carefully done. Run a gentle garden hose on one section of flashing at a time, while someone watches inside. Start low, move up. If a leak appears when water hits a specific side of the chimney, you have found the area.
If the stain appears after a single heavy storm, the flashing is the prime suspect. If the stain grows steadily over weeks of dry weather, suspect a cracked crown or a missing chimney cap instead. A thorough inspection from a certified chimney sweep or roofer is worth the visit fee if the diagnosis is not obvious.
What a proper chimney flashing repair looks like
A real repair is a small piece of carpentry, metalwork, and masonry. The goal is not to smear more sealant over the old flashing. The goal is to replace the failed layers, secure the metal correctly, and let the new flashing do the work.
Step 1. Remove surrounding shingles
The roofer lifts the shingles in the area around the chimney, usually one or two courses above and to the sides. The shingles are usually reusable if they come up clean and are not brittle.
Step 2. Cut and remove old flashing
Old base flashing, step flashing, and counter flashing are removed. Counter flashing that was let into a reglet is pried or ground out of the mortar joint. Any sealant and old nails are cleaned off the brick.
Step 3. Inspect and prepare the chimney
The mason or roofer inspects the mortar joints where the new counter flashing will seat. Soft, sandy, or missing mortar is repointed first. A clean, sound reglet is cut if needed, typically about 1.5 inches deep into a sound mortar joint, never into the brick face.
Step 4. Install new base and step flashing
New L-shaped base flashing is installed on the downslope and sides. Each piece of step flashing is layered between courses of shingles on the upslope side, with each piece overlapping the one below by at least 2 inches.
Step 5. Install counter flashing
For additional context, New counter flashing is set into the reglet, folded down over the top edge of the base flashing, and either sealed with a quality masonry sealant or, on a premium job, wedged in and sealed with a separate flashing wedge so the sealant is not the only anchor.
Step 6. Install or rebuild the cricket
If the chimney is wide, a cricket is framed into the upslope roof, sheathed, shingled to match, and flashed into both the roof and the chimney. This is the part most often skipped, and the part that prevents the most common recurring leak on wide chimneys.
Step 7. Reseal the shingles and clean up
Shingles are re-nailed as needed, sealant is applied only where the manufacturer specifies, and metal shavings are swept out of the gutters. A magnet roll over the work area catches dropped fasteners.
A complete flashing replacement on a single-story, straightforward chimney usually takes a two-person crew half a day to a full day. The work is loud, involves a grinder on the chimney, and creates metal debris. Plan to keep pets and children clear of the work zone.
Chimney flashing repair cost in 2026
Pricing varies by region, roof pitch, chimney size, and material. The ranges below are realistic for most U.S. markets in 2026, based on the type of work performed. They are not quotes.
| Type of work | Typical 2026 cost range | What is included |
|---|---|---|
| Spot reseal and re-bed of counter flashing | $250 to $600 | Old sealant removed, new polyurethane or polymer sealant, small counter flashing patch. No metal replaced. |
| Partial flashing replacement (one side, simple chimney) | $600 to $1,200 | New step and counter flashing on one face, shingle work as needed, basic sealant. |
| Full flashing replacement (standard chimney, galvanized or aluminum) | $1,500 to $3,000 | Removal of old flashing, new base, step, apron, and counter flashing on all sides, shingle rework, basic sealant. |
| Full flashing replacement with copper or stainless steel | $3,000 to $6,000 | Same scope as above, premium metal, soldered or mechanically locked seams, longer service life. |
| Full flashing replacement plus new cricket | $2,500 to $5,000 | Includes framing, sheathing, and shingling the cricket, in addition to the full flashing scope. |
| Crown rebuild done at the same time | $500 to $1,500 added | Often combined with a flashing job to address all chimney water entry in one visit. |
A written estimate should itemize the material (galvanized, aluminum, copper, or stainless), the scope (full or partial), the inclusion of a cricket if needed, and whether shingle replacement is charged separately. If a quote is a single line that says “repair flashing” with a flat number, ask for the breakdown before signing.
When a temporary DIY patch makes sense
A full chimney flashing repair is not a safe or sensible first-time DIY project. Chimney work means heights, power tools on a roof, and metalwork that has to be done precisely. That said, there are moments when a short-term patch is the right call.
- Waiting for a professional visit. If a storm tore a corner of counter flashing loose and a roofer cannot come for a week, a careful bead of high-grade polyurethane sealant and a temporary metal patch under the lifted edge can hold.
- Diagnostic confirmation. Sealing one side of the chimney and watching the interior stain over a few rain events can confirm the leak source before spending on a full repair.
- Renter or seller situation. If the property will be sold as-is within a year, a documented patch by a licensed contractor can be a reasonable bridge.
A few rules keep a temporary patch from becoming a real problem:
- Never seal the underside of flashing where it meets the chimney. Seal only the top edge of counter flashing into the reglet, and the exposed top of step flashing.
- Use a sealant rated for roofing and masonry, not general-purpose silicone. Look for polyurethane or a polymer-based product labeled for roof flashing.
- Stay off the roof if the pitch is steeper than a 6/12, the surface is wet or frosty, or there is no one on the ground who knows you are up there.
- Do not drive nails into the chimney to hold a patch. Anchors belong in mortar joints, and only with the right fasteners.
- Treat any patch as a 60 to 90 day stopgap, not a fix. Schedule the real work and budget for it.
For most homeowners, the safer path is to schedule the real repair, even if it takes a few weeks, rather than climb a roof they do not regularly work on.
How to choose the right contractor
Chimney flashing repair sits at the intersection of two trades: roofing and masonry. The best person for the job is often a roofing contractor who does chimney flashing weekly, a chimney service that employs a roofer, or a small company that does both. A general handyperson is rarely the right choice, even if they are skilled elsewhere.
Credentials to look for
- State or local roofing contractor license where required.
- Liability insurance and workers’ comp, with the policy sent to you on request.
- Membership in a national or regional trade association, such as the National Roofing Contractors Association, is a positive sign but not required.
- For chimney-specific work, certification from the Chimney Safety Institute of America (CSIA) is the standard credential.
Questions to ask before signing
- Will you replace all flashing on all four sides, or only the failed side? A piecemeal fix is sometimes the right call, sometimes a waste of money.
- What metal are you using, and is the gauge and material written into the estimate?
- Will you install or rebuild a cricket on the upslope side if my chimney is wide enough to need one?
- How will you anchor the counter flashing, and will the reglet be cut into a mortar joint, not the brick face?
- What sealant will you use, and where exactly will it be applied?
- What warranty do you offer on labor, and what warranty does the material manufacturer offer?
- Will the work be done by your own crew or subcontracted?
Three written estimates are a useful rule of thumb. If one is dramatically lower than the other two, the difference is usually in scope, not in generosity.
How flashing repair connects to the rest of the chimney
Flashing is one piece of a complete water management system on a chimney. A careful contractor looks at the whole system before starting work, because fixing one part can reveal the next weakest point.
- Chimney cap. A cap keeps rain out of the flue and prevents animal intrusion. Missing or rusted caps are a frequent companion problem to failing flashing.
- Crown or wash. The cement surface on top of the chimney should slope away from the flue and overhang the brick by about 2 inches. A cracked crown lets water into the masonry, which then migrates to the flashing joint and looks like a flashing leak.
- Mortar joints. Repointing soft joints is often bundled with flashing work, because the reglet for new counter flashing has to land in sound mortar.
- Brick sealing. A breathable water repellent applied to the masonry can extend the life of both the brick and the flashing, but only if the chimney is sound first. Sealing over a wet chimney traps moisture.
Asking a contractor to walk the full chimney, not just the flashing area, often catches a small problem before it becomes a large one. Most reputable roofers will do this as part of the estimate visit.
What happens if flashing is ignored
A small leak around the chimney rarely stays small. The water path is predictable, and the damage compounds.
- Insulation saturation. Cellulose or fiberglass insulation around the chimney loses R-value when wet and holds moisture against the framing.
- Ceiling and wall damage. Drywall, plaster, and paint blister. Wood trim swells. The visible stain is usually 3 to 5 times larger than the actual wet area behind it.
- Mold growth. A dark, unventilated ceiling cavity is a textbook mold environment. Remediation costs commonly run $1,500 to $5,000 for a localized case and much more for a spread problem.
- Framing rot. Rafters and ceiling joists around the chimney can lose structural capacity over years of slow wetting. Sistering new lumber is expensive.
- Masonry damage. Water that enters the flashing joint saturates the back of the brick. Freeze-thaw cycles spall the brick face and force repointing far earlier than would otherwise be needed.
- Fire risk. A long-term leak that wets wood framing near a wood-burning fireplace is a documented cause of house fires. The chimney structure was never meant to stay wet during use.
The cost of a single flashing replacement is almost always less than the cost of the secondary damage from a leak that runs for a season or more. Acting on the first stain, not the second, is the most reliable way to keep the bill small.
A short homeowner checklist before scheduling work
- Note the size, location, and date the interior stain first appeared.
- Photograph the chimney from the ground in good light, including the upslope side if visible.
- Check the attic for dark staining on the sheathing around the chimney.
- Confirm whether the chimney is in active use, because an unused flue may need a different cap or even a partial demo plan.
- Get two or three written estimates that name the material, scope, and warranty.
- Ask for proof of insurance and any CSIA or roofing license numbers.
- Plan for the work to take half a day to a full day and to be loud.
This list fits on a single page and turns a stressful first call into a focused conversation with a contractor.
Related resources worth reading
Frequently asked questions
How long does a chimney flashing repair take?
A straightforward full flashing replacement on a single-story home with a standard-sized chimney usually takes a two-person crew half a day to a full day. Wider chimneys that need a cricket, very steep roofs, or premium copper work can stretch into two days. The estimate should include setup, removal, and cleanup time.
Can chimney flashing be repaired without replacing the whole roof?
Yes. Flashing is a separate system from the shingles, and a good contractor can lift the surrounding shingles, replace the flashing, and re-lay the same shingles in most cases. If the shingles are brittle or the roof is near the end of its life, the roofer may recommend a full reroof at the same time, but it is rarely required just to fix the flashing.
What is the difference between flashing repair and flashing replacement?
A repair is a targeted fix, such as resealing a counter flashing reglet or replacing a few pieces of step flashing on one side. A replacement removes all of the old flashing and installs a new system on every side of the chimney. Replacement is the right call when the metal is corroded, the system relies heavily on old sealant, or there have been multiple past repairs.
How do I know if my chimney leak is flashing or something else?
A flashing leak usually shows as a ceiling stain away from the chimney, gets worse during wind-driven rain from the side with the most exposure, and leaves a dark water track on the attic sheathing near the chimney. A crown or cap leak tends to wet the inside of the firebox or the masonry itself. A hose test on one side of the chimney at a time, with someone watching inside, can confirm the diagnosis.
Is chimney flashing repair covered by homeowners insurance?
It depends on the cause. Sudden damage from a named storm is often covered. Long-term failure from age, wear, or poor installation is usually considered maintenance and is not. Read your policy’s dwelling coverage section, and document the date you first noticed the leak with photographs, because adjusters pay close attention to the timeline.
Can I repair chimney flashing myself?
A temporary patch with the right sealant is reasonable for a homeowner comfortable on a low-slope roof, but a full repair is not a first-time DIY job. The work involves heights, a grinder on masonry, and metalwork that has to be precise to last. For anything beyond a stopgap, hire a licensed roofing contractor or a CSIA-certified chimney technician.
How often should chimney flashing be inspected?
Once a year is a reasonable baseline, ideally during a fall chimney inspection before heating season. Homes in areas with severe weather, or chimneys older than 15 years, benefit from a quick visual check from the ground after major storms as well.
What is the best material for new chimney flashing?
For most homes, stainless steel or copper offers the best long-term value, with service lives of 40 to 80 years. Galvanized steel is the budget standard and performs well when properly installed and painted or coated. Aluminum is a middle option that does not rust but can dent and react with masonry if in direct contact.
Do I need a cricket on my chimney?
Most building guidance calls for a cricket on any chimney wider than 30 inches on the upslope side. A cricket splits water and debris around the chimney instead of letting a pond form behind it. Skipping it on a wide chimney is one of the most common causes of recurring flashing leaks.
What should a chimney flashing repair estimate include?
Look for the metal type and gauge, the scope on each side of the chimney, whether a cricket is included if needed, the sealant brand, who is doing the work, the labor warranty length, and whether shingle replacement is separate. A single line item that just says “flashing repair” is a reason to ask follow-up questions before signing.
Leave a Reply