
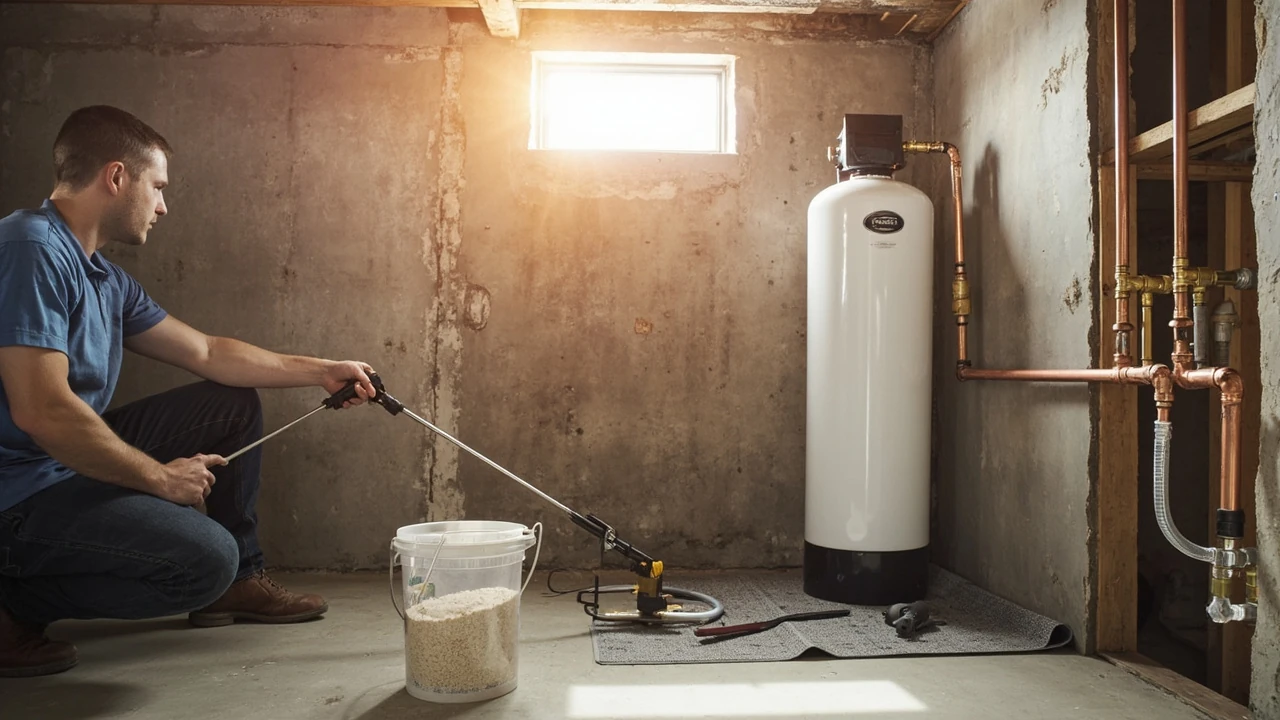
Water softener installation cost: what homeowners actually pay
Most homeowners who call a plumber about hard water end up asking the same question first: what is the realistic water softener installation cost for a house like mine, and where does the money actually go? The honest answer is that a typical whole-home installation in a single-family house lands somewhere between about $1,200 and $3,800 all-in, with most projects clustering near the middle of that range. The wide spread is not a sign that contractors are guessing; it reflects real differences in equipment size, plumbing complexity, electrical work, drain routing, and regional labor rates. Understanding how those pieces fit together is the difference between budgeting for a project and being surprised by a quote.
This guide walks through the price ranges you can reasonably expect, the line items that make up a typical invoice, the choices that meaningfully change the total, and the decisions that rarely affect cost at all. It is written for a homeowner evaluating a quote, comparing two bids, or trying to decide whether a softener is worth the spend in the first place. Where prices can vary by region or by home layout, the article explains the mechanism rather than pretending there is a single national number.
Where the cost actually comes from
A water softener invoice is usually a stack of four building blocks: the unit itself, any plumbing modifications, electrical or drain work, and labor. Some quotes roll these into one number, others separate them line by line, and a few bury part of the work in a flat “installation fee.” Asking a contractor to break out each piece is the single most useful thing you can do before signing.
The equipment is the largest variable. A basic ion-exchange softener sized for a 1-to-3-bathroom home can be purchased for a few hundred dollars at a big-box store, while a high-capacity unit with a smart metered valve, dual tanks, or higher grain capacity can run well into four figures. Plumbing modifications include adding or moving a bypass loop, tying into existing supply lines, and installing a discharge line for the brine tank. Electrical work covers a nearby outlet, a dedicated circuit in older homes, or a conduit run if the softener lives in an unfinished basement. Labor is the part most homeowners underestimate, because the visible work of setting a tank on the floor is a small fraction of what a careful installer actually does.
Typical cost ranges at a glance
The table below summarizes what homeowners report paying in common scenarios. Numbers are intended as a planning range, not a quote. Actual pricing in your area may fall outside these bands based on local labor rates, code requirements, and the condition of your existing plumbing.
| Project type | Equipment | Installation labor and materials | Typical all-in range |
|---|---|---|---|
| Basic swap, accessible location | Entry-level 32,000-grain unit | 1 to 2 hours, minimal plumbing changes | $1,200 to $1,800 |
| Standard new install, basement or utility room | Mid-range 40,000 to 48,000-grain unit | 3 to 5 hours, bypass loop, drain line, outlet | $1,800 to $2,800 |
| Larger home or high-capacity install | High-capacity or dual-tank system | 5 to 8 hours, possible repiping section | $2,800 to $3,800 |
| Tight retrofit (crawlspace, slab, or finished space) | Compact unit | 6 to 10 hours, routing through joists or walls | $3,200 to $4,800+ |
| DIY equipment purchase plus pro hookup | Homeowner-supplied unit | 2 to 4 hours professional hookup only | $400 to $900 labor |
These ranges assume a standard 120V electrical outlet within reach of the unit, a code-approved drain point such as a floor drain, standpipe, or utility sink, and a location within a few feet of the main water line. Move the softener farther from the main, add a subpanel, or cut into a finished wall, and the upper bands can climb quickly.
What drives the quote up or down
Most of the variation between two quotes on the same house comes down to a handful of decisions and site conditions. Walking through them with your installer, or just understanding them before you call, will keep the conversation focused.
- Unit capacity and valve type. Larger grain capacity and metered or smart valves cost more than simple time-clock models. The right size depends on household size, water hardness, and daily water use, not on buying the biggest tank available.
- Distance from the main water line. Every extra foot of plumbing, fittings, and shutoff valves adds material and labor. Locating the softener close to where the water enters the house is the cheapest layout.
- Drain routing. A softener needs a place to discharge brine during regeneration. An existing floor drain or utility sink is the simplest option. Running a new drain line across a basement or up into a wall is a common source of surprise cost.
- Electrical access. Modern softeners need a standard outlet. If none is nearby, an electrician’s visit for a new receptacle or a dedicated circuit adds to the bill, especially in older homes with limited panel capacity.
- Bypass and isolation valves. A proper bypass loop lets you service the softener without shutting off water to the house. Skipping it is a false economy if anything downstream ever leaks.
- Permits and code requirements. Some municipalities require a plumbing permit for a new softener, especially if the main is being cut into. Permit fees are usually modest, but inspection scheduling can affect timeline.
- Site access. Tight crawlspaces, finished basements, or slab foundations make every step slower. The same job in an unfinished mechanical room may take two hours; in a finished basement it can take most of a day.
Equipment-only prices versus installed prices
It is worth pausing on the difference between equipment-only pricing and a full installed price, because the gap is where most buyer confusion lives. A retail water softener at a home improvement store might be advertised for $400 to $900, which looks like a bargain compared to a $2,500 turnkey install. The store price covers the tank, the valve, and a brine tank. It does not cover the fittings, valves, drain line, electrical, labor to cut into the main, or the time to set the system, program it, and test it.
A useful mental model is that the equipment is roughly 40 to 60 percent of a turnkey install, and the rest is materials and labor. If a contractor quotes $2,200 turnkey on a $900 unit, the markup is not unreasonable once you account for two to four hours of skilled labor, fittings, the bypass, the drain work, and warranty support if something goes wrong. The trap to avoid is comparing the equipment price to an installed price and assuming someone is padding the bill.
How to read a written estimate
A clear estimate does more than show a total. It shows you what the contractor thinks the job is, which is the best way to compare two bids apples to apples. The list below is a practical checklist of what a useful quote should include.
- Make and model of the softener, including grain capacity and valve type
- Whether the price includes the brine tank and any accessories such as a sediment prefilter
- Plumbing scope: where the tie-in happens, what valves and fittings are included, and whether any pipe needs to be replaced
- Drain line routing, including any new piping, air gap fittings, or holes through studs or joists
- Electrical scope: whether a new outlet is included or assumed to exist
- Labor hours or a flat labor figure, with a clear statement of what is and is not included
- Permit handling: who pulls the permit and whether the fee is included
- Startup, programming, and a walkthrough of how to set salt levels and regeneration cycles
- Warranty terms on equipment and on the installation workmanship
- Cleanup expectations and any restoration work, such as patching drywall or repainting a finished wall
If a quote is missing several of these items, it is fair to ask the contractor to flesh it out. Vague bids tend to produce change orders, and change orders are where projects quietly grow past the original number.
Plumbing and site work that often add cost
Plumbing and site work are the most common source of cost overruns because the conditions are invisible until the installer opens a wall or crawls under a floor. A few situations come up often enough to be worth knowing about in advance.
Older galvanized or brittle copper. Cutting into an older main can crack pipes that look fine from the outside. If the main is at the end of its life, a partial repipe of the section near the softener may be the responsible recommendation, and it will show up as an extra line item.
No nearby drain. Brine discharge has to go somewhere. A floor drain within a few feet of the planned location is the easiest case. If the closest drain is across the room, in a wall cavity, or in a finished area, routing the discharge line and adding an air gap can add several hundred dollars in labor and materials.
No outlet within reach. A softener draws a small amount of power for the control valve, but it still needs a real outlet on a circuit that is not shared with a freezer or other large appliance. In a basement mechanical room that never had a convenience outlet, an electrician’s visit is sometimes the largest single line outside of equipment.
Finished spaces. A softener installed in a finished hallway closet, under a kitchen sink, or in a tight utility closet looks tidy but takes longer. Every cut and connection has to be made in a confined space, and any drywall opening has to be patched and painted. The labor is real, even if the finished product looks simple.
Crawlspace or slab foundations. Running new plumbing on a slab means opening the slab, which most homeowners want to avoid. In a crawlspace, the work is feasible but slower, and condition of existing piping matters. Either scenario pushes the project toward the higher bands.
Sizing the system to the home
Oversizing is one of the most common mistakes, and it shows up in quotes as a higher equipment line. Bigger is not better when the system is too large for the household, because regeneration cycles get stretched out and efficiency drops. The right size is driven by three numbers: household size, daily water use, and the hardness level of the incoming water.
Two people in a 2-bathroom home with moderately hard water can usually be served by a 32,000 to 40,000-grain unit. A family of five in a 3-bathroom home with very hard water may need 48,000 grains or more, or even a twin-alternating system that keeps soft water available 24/7. A water test from a local lab, or a free test strip from a softener dealer, is the most useful input to a sizing conversation. Without it, sizing is guesswork dressed up in product brochures.
Salt, salt usage, and operating cost
Installation is the headline cost, but it is worth thinking about operating cost before the project starts, because it affects how the system is sized and what kind of valve is worth paying for. Operating cost breaks into three pieces: salt, water used during regeneration, and electricity for the control valve. Of these, salt is by far the largest.
A typical family uses somewhere between 40 and 80 pounds of salt per month, depending on hardness, household size, and the efficiency of the control valve. A metered or demand-initiated regeneration valve only regenerates when soft water is actually needed, which can cut salt use substantially compared with a simple time-clock valve that regenerates on a fixed schedule. The valve type can move operating cost enough that the upgrade pays for itself within a few years on larger homes, which is one reason quotes for two similar units can differ by several hundred dollars.
| Operating factor | What affects it | Typical homeowner impact |
|---|---|---|
| Salt use | Hardness level, household size, valve type | About $5 to $15 per month for most homes |
| Regeneration water | Valve efficiency, tank size | A few hundred gallons per week added to water bill |
| Electricity | Valve type, transformer draw | A few dollars per year in most cases |
| Annual service | Resin life, water quality, usage | Optional cleaning or sanitizing every 1 to 2 years |
Permits, codes, and what inspectors care about
Not every jurisdiction treats a water softener the same way. In some areas, swapping a softener in an existing loop is considered minor plumbing work and needs no permit. In others, cutting into the main supply line or adding a new drain requires a permit and an inspection. The simplest path is to ask your installer directly whether a permit is required and who is pulling it.
Inspectors tend to care about a few specific things. The bypass valve must allow the home to be isolated from the softener without shutting off the main. The drain line must have an air gap to prevent brine from siphoning back into the potable system. The discharge point must be approved for water-softener waste in your jurisdiction; some areas do not allow brine discharge into a septic system, for example, while others require a separate drywell. A contractor who has worked in your municipality before will know the local expectations, which is one of the reasons a local installer often costs a little more than the cheapest out-of-area bid.
DIY versus professional installation
Plenty of homeowners buy a softener from a retail store and hire a plumber just to do the hookup, and that approach can save several hundred dollars if the install is straightforward. The break-even point depends on how comfortable the homeowner is with cutting into a main supply line, soldering or pressing copper, running a drain line, and bringing the electrical up to code.
For a basic installation in an unfinished basement with a main within reach, an experienced DIYer can do the work in a day. For a retrofit in a finished space, on a slab, or with any uncertainty about the condition of the existing plumbing, paying a professional is almost always the cheaper option once you account for the cost of a small mistake. A leak inside a wall can dwarf the savings on labor, and some manufacturers will not honor warranty claims on a self-installed unit in certain situations.
The middle path many homeowners choose is to buy the equipment themselves and pay a licensed plumber to do the tie-in, drain, and startup. The result is a smaller labor bill, equipment chosen by the homeowner, and the work itself done by someone who carries insurance if something goes wrong. It is a reasonable compromise and a useful comparison point when evaluating a turnkey quote.
How to compare two quotes that look different
It is common to receive two quotes that differ by $600 or more for what looks like the same job. Before assuming one contractor is overpriced, walk through the comparison carefully. The list below is a practical way to bring the bids onto the same page.
- Confirm that both quotes are for the same grain capacity and the same valve type, including whether the valve is metered or time-clock only.
- Check whether both quotes include a bypass loop, a sediment prefilter, and any required isolation valves.
- Look at the drain line scope, including how far the line runs and whether an air gap is included.
- Check whether electrical work is included or assumed to exist.
- Ask each contractor about permit handling and whether inspection is part of the price.
- Compare warranty terms, including how long the workmanship warranty lasts and what it covers.
- Ask about the salt level at startup, whether the system will be programmed for your actual hardness, and whether a water test is included.
Two quotes that look far apart on price often turn out to be different scopes, and the lower number is not always the better deal once the scope is aligned.
Red flags when reviewing a quote
A few patterns are worth pausing on, not because they always mean trouble, but because they tend to produce unhappy projects. A written quote that does not name the equipment brand and model is hard to verify and hard to compare. A price that is dramatically lower than other bids in your area often means the scope is thinner, the equipment is lower-capacity, or the contractor is not including something that will appear as a change order later.
High-pressure tactics around a single-day or expiring discount are another sign to slow down. Softener pricing does not move day to day, and a legitimate installer will let a homeowner think about a project of this size. Finally, be cautious about a contractor who refuses to discuss drain routing, permits, or warranty in writing. A clear answer in the estimate is worth more than a friendly handshake on the phone.
What a good installer does on the day of the job
A well-run installation follows a predictable rhythm, and watching for it is a useful way to judge whether the work is going as planned. The crew should shut off the water and relieve pressure before any cuts. The main should be cut cleanly, with new valves oriented so they can be operated without tools. The bypass loop should be tested by isolating the softener and confirming that the house still has water. The drain line should be run with a continuous slope to the discharge point, with an air gap where it meets the drain.
After the system is pressurized, the installer should check every fitting for leaks, program the control valve to match the measured hardness of your water, set the regeneration time for a low-use hour, and walk you through salt level, error codes, and basic maintenance. A good installer leaves the work area clean, leaves the warranty paperwork on the counter, and is reachable by phone if a question comes up a week later. None of that is a separate line item, but it is part of what a professional quote is paying for.
Where water softeners fit in a broader home care plan
It helps to think of a softener as one part of a home’s water and equipment routine rather than a standalone project. Softened water tends to extend the life of water heaters, dishwashers, and washing machine valves, which is part of the long-term value of the install. It also pairs well with a simple sediment prefilter ahead of the softener, especially in homes with older supply lines, and with a routine of checking anode rods in the water heater since softened water can be slightly more aggressive on certain metals.
Homeowners who already keep up with other routine maintenance, like the kind covered in a guide to laundry dryer vent cleaning, often find that a softener slots in naturally as part of the same care mindset. The two tasks are different, but the underlying habit of staying ahead of small problems is the same, and the cost of either is much smaller when it is planned for rather than handled as an emergency.
What is and is not worth paying extra for
A few upgrades are worth the money, and a few are not. A metered or demand-initiated valve is usually worth it on any home larger than a two-person household, because the salt savings over a decade typically exceed the upfront price difference. A proper bypass loop is worth it in every case. A sediment prefilter ahead of the softener is worth it for any home on a well or in an area with known sediment issues, and is a minor cost in new construction.
On the other side, the most expensive unit in a dealer’s lineup is rarely necessary for an average home. Twin-alternating systems make sense for very large households or for homes where a brief hard-water window during regeneration is genuinely a problem, but most families never notice. Touchscreen control panels and Wi-Fi modules are convenient but do not change the water, and the money is often better spent on a slightly larger grain capacity that actually fits the household’s usage. Asking the installer to explain the practical difference of each upgrade is a fair question and usually gets a useful answer.
Planning the budget realistically
The most useful way to budget for a water softener project is to set three numbers: a target, a midpoint, and a ceiling. The target is the all-in cost of a basic install with a mid-range unit in a straightforward location. The midpoint is a reasonable allowance for a small amount of additional plumbing or electrical work. The ceiling is the higher number a contractor might quote for a tight retrofit, and it is the number that should trigger a conversation about whether the scope is correct.
For a typical single-family home, a sensible budget is to plan for about $1,800 to $2,500 as the realistic midpoint, with $1,200 as a stretch case and $3,800 as the ceiling before the scope needs to be re-examined. Holding the ceiling below the cost of repiping a section of the home or opening a slab keeps the project in the category of a planned upgrade rather than an emergency repair.
Frequently asked questions
How much does water softener installation cost on average?
For a typical single-family home, most projects fall between $1,200 and $3,800 all-in, with the middle of the range around $1,800 to $2,500. The exact number depends on equipment size, plumbing complexity, and how much additional drain or electrical work the home needs.
Does a water softener installation cost more on a slab foundation?
Usually yes. Running new plumbing on a slab often means opening the floor or routing lines through walls and ceilings, which adds labor. Many homeowners in slab homes choose to locate the softener in a garage, utility closet, or near the water heater to keep the run short.
Can a plumber install a water softener I bought myself?
Yes, and many homeowners do exactly that. A licensed plumber can handle the tie-in, drain, and startup, with labor typically in the $400 to $900 range for a straightforward install. Buying the unit yourself can reduce the total project cost, though you give up the contractor’s package pricing and any bundled warranty.
Is a permit required for a water softener installation?
It depends on the jurisdiction. Some areas treat it as minor plumbing work that needs no permit, while others require a permit and an inspection whenever the main supply is cut into. Your installer should know the local rule and include permit handling in the quote if one is required.
How long does a typical water softener installation take?
Most straightforward installs take 2 to 5 hours. Tight retrofits in finished spaces, on slabs, or with extensive drain routing can take a full day or more. The installer should give a time estimate along with the quote.
What is the difference between a time-clock and a metered softener valve?
A time-clock valve regenerates on a fixed schedule, whether the softener needs it or not. A metered or demand-initiated valve regenerates based on actual water use, which usually cuts salt consumption significantly. Metered valves cost more upfront but save money over the life of the system, especially in larger households.
How long does a water softener last before it needs to be replaced?
A well-maintained ion-exchange softener typically lasts 10 to 15 years. The resin can be replaced at roughly the halfway point if performance drops, which is usually cheaper than replacing the whole unit. Hardness of the supply water, water usage, and maintenance all affect the actual lifespan.
Does installing a water softener increase home value?
It is rarely listed as a value-adding feature the way a new kitchen might be, but in areas with hard water, buyers often appreciate a softener that is already installed and properly maintained. It is more of a quality-of-life and equipment-protection upgrade than a resale-driven project.
How do I know if my home actually needs a water softener?
The clearest signs are visible scale on faucets and showerheads, spotting on glassware and dishes, soap that does not lather well, and a white crust on appliance elements like the inside of a kettle. A water test from a local lab or a free test strip from a dealer will give you a hardness number in grains per gallon, which is more useful than a guess.
What kind of maintenance should I plan for after installation?
For most homeowners, the routine is simple: keep the brine tank at least one-third full of salt, break up any salt bridges that form, and occasionally sanitize the system if there is an odor or a long gap between regenerations. A water test every couple of years confirms that the settings are still right for the supply.
A final practical note: the cheapest installation is rarely the best one, and the most expensive is not always the best either. The goal is a system that is sized to the home, installed cleanly, and supported by someone local who will answer the phone next year. If the quote you are looking at does all three, the number is probably reasonable. If it does not, no amount of discount makes it a good deal. For more context on how a softener fits with other home care decisions, the bathroom cleaning services overview is a useful reminder that small, well-maintained systems tend to outlast bigger ones that get ignored.
Leave a Reply