
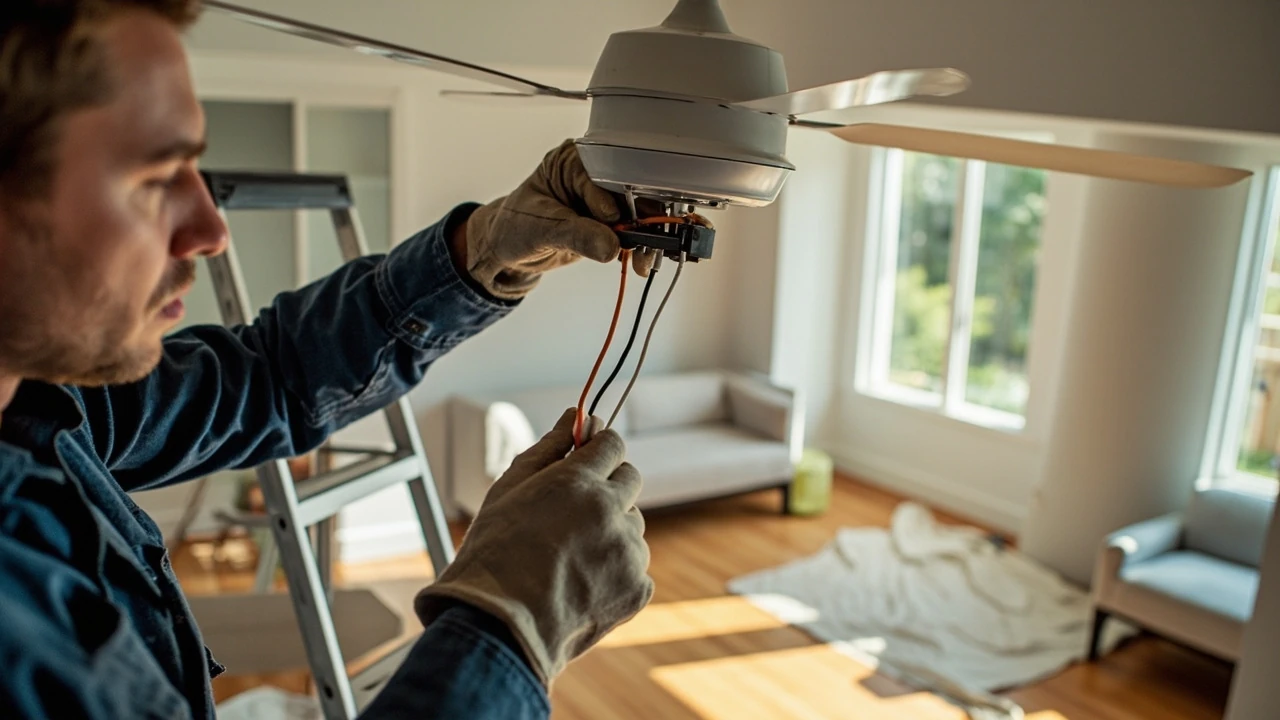
Electrician to install a ceiling fan: when it makes sense and what to expect
You bought the fan, the box is sitting in the hallway, and the instruction manual is open on the kitchen table. What stops most people at this point is not the assembly; it is the part where the wires come out of the ceiling and you are expected to know which one is which. Hiring an electrician to install a ceiling fan is the most common way to close that gap, and it is a fairly small service call compared with most other electrical work. The job is routine, it usually takes under two hours, and the result is a fan that is wired to code, balanced, and safely supported by the ceiling structure.
That does not mean every ceiling fan installation is identical. Some homes already have a fixture in place and just need a swap. Others have no fixture at all and need new wire, a new box, and possibly a new switch leg. A few involve a vaulted ceiling, a long downrod, or a remote-control module that adds extra steps. Knowing which category your project falls into helps you decide whether you need a licensed electrician, what the work should include, and what a fair price looks like in your area.
This guide walks through what an electrician to install a ceiling fan actually does on a typical visit, when local rules require a licensed professional, what affects the cost, and how to prepare your home so the visit goes smoothly.
What the job actually involves
A standard ceiling fan installation has three distinct phases: checking the existing electrical setup, mounting and wiring the new fan, and testing the result. The order matters because the first phase determines what the rest of the visit will look like.
Phase 1: site check and power isolation
Before any tools go up the ladder, the electrician turns off the correct circuit at the panel and confirms the power is off with a non-contact voltage tester. They then look at the existing ceiling box, the switch on the wall, and the wiring between them. The ceiling box is the part that holds the fan to the structure of the house, and it is the single most common reason an installation turns into a bigger job.
A standard light fixture box is rated for about 10 to 15 pounds. Most ceiling fans weigh between 12 and 25 pounds, and they also create dynamic load when they spin. For that reason, the National Electrical Code requires a fan-rated box that is either attached directly to a joist or supported by a listed brace rated for fan use. If the existing box is not fan-rated, the electrician will replace it, which usually adds a small amount of labor and a few dollars in materials.
Phase 2: mounting and wiring
With the right box in place, the electrician mounts the bracket, runs the downrod if the fan uses one, and attaches the motor housing. Wiring is the part homeowners tend to worry about most, and in practice it is also the simplest. In a typical swap, there are three wires in the ceiling: a hot wire (usually black), a neutral (white), and a ground (bare copper or green). The fan wires are color-matched, and the connections are made with wire nuts and wrapped with electrical tape as a secondary safeguard.
If the fan is controlled by a wall switch, only the hot and neutral need to reach the switch leg. If the fan has a separate light kit on its own switch, the ceiling box needs an additional conductor. Some fans are also designed to work with a remote control module that sits in the canopy and communicates with a handheld transmitter; in that case, the electrician wires the receiver in series with the fan and pairs it with the remote before finishing.
Phase 3: testing, balancing, and cleanup
Once the fan is up, the electrician restores power, tests the fan at each speed, and checks the light kit if the fan has one. A slight wobble in the first few minutes is common and is usually fixed by tightening the downrod set screws or by attaching the included balancing clips to one of the blades. The visit ends with a quick check of the switch plate, a wipe-down of the canopy, and a bag left for the old fixture and any packaging.
When local rules actually require a licensed electrician
Rules vary by state and by municipality, but the broad outline is consistent across most of the United States. If the work involves running new cable, adding a new circuit, or modifying the existing wiring inside the walls, most jurisdictions require a licensed electrician and a permit. A like-for-like swap in the same box, with no new wiring, is often allowed for a homeowner to do themselves, although some cities and many homeowners’ insurance policies still prefer a licensed professional for any ceiling fan work.
There are three situations where hiring a licensed electrician is essentially non-optional:
- You do not have an existing fixture at the install location, and new cable needs to be fished through the ceiling or wall.
- The existing box is not fan-rated, and the ceiling needs to be opened up to install a brace or a new fan-rated box.
- The fan is being installed on a vaulted or angled ceiling, which usually requires a specific downrod length and an angled mounting kit that changes how the box is attached.
Even when the rules technically allow a homeowner to do the work, the practical case for hiring a professional is strong. A licensed electrician carries liability insurance, knows the local code requirements, and can spot issues such as aluminum branch wiring, an overloaded circuit, or a missing ground that a homeowner might miss. According to a detailed overview from Sunglow’s guide to ceiling fan installation, the most common reasons people ultimately call a professional are safety concerns about working with live wiring, code compliance, and the desire for a clean, reliable mounting on the existing ceiling structure.
How long the visit usually takes
A straightforward swap, where the existing box is already fan-rated and the new fan matches the existing wiring, takes about 60 to 90 minutes. Adding a fan-rated box replacement adds roughly 20 to 30 minutes. Running new wire to a switch location, installing a new brace in a ceiling with no fixture, or installing a fan on a vaulted ceiling with a long downrod can push the visit to two or three hours.
Two variables are worth flagging when you book:
- Whether the fan is assembled when the electrician arrives. Most fans come with the motor, blades, light kit, and downrod in separate pieces. If the electrician is assembling the fan on a ladder, that adds time compared with assembling it on the floor first.
- Whether the old fixture needs to be removed. Removal is usually quick, but fixtures with brittle plaster, old fabric-insulated wire, or a painted-in place canopy can be slow to detach.
If you want the visit to be as short as possible, clear the room of furniture, lay down a drop cloth, and have the fan and all included parts in one place so the electrician can verify the contents before starting.
What affects the price
Most ceiling fan installations fall in the $150 to $400 range for labor, with the national average around $250 according to aggregated cost data from home services platforms. The fan itself is a separate cost, and fan prices vary widely depending on size, brand, and whether the unit includes a light kit or a remote.
The labor price moves up or down based on a few predictable factors:
- Whether new wiring or a new circuit is required. A simple swap is at the low end. New cable, a new switch, and a new box push the price toward the upper end.
- Ceiling height and angle. Standard 8 or 9 foot ceilings are easy. Vaulted ceilings, two-story foyers, and ceilings over staircases often require an extra pair of hands and a taller ladder.
- Whether the old fixture had unusual wiring. Homes built before the 1960s sometimes have knob-and-tube wiring, fabric-insulated wire, or aluminum branch wiring that needs a special connector or a small repair before the new fan can be safely connected.
- Local permitting. Some cities require an electrical permit for any new wiring work, and the permit fee is typically added to the invoice.
Materials are usually billed separately. A fan-rated ceiling box costs a few dollars, a brace for a retrofit install costs around $20, and a few wire nuts, a roll of electrical tape, and a replacement canopy medallion bring the materials total to under $40 in most cases. If the electrician is providing the fan itself, expect the unit cost to be marked up compared with retail, but the convenience of a single visit often makes that worthwhile.
DIY versus hiring out: a real comparison
It is worth laying the two paths side by side, because the decision usually comes down to a few concrete questions about your home, your tools, and your comfort level with electrical work.
| Factor | DIY installation | Licensed electrician |
|---|---|---|
| Typical cost | Fan price only, plus about $20 in materials | $150 to $400 labor, plus materials |
| Time required | 2 to 4 hours for a first-time install | 1 to 2 hours, scheduled |
| Permit needed | Sometimes, depending on local rules and scope | Yes, when new wiring is involved; electrician handles it |
| Warranty and insurance | None on the labor; fan warranty usually preserved | Labor is warrantied; work is insured |
| Risk of code issues | Higher, especially around box rating and grounding | Low; covered by code knowledge |
| Best suited for | Simple swap in a fan-rated box, homeowner comfortable with electrical work | New wiring, vaulted ceilings, old homes, or homeowners who prefer not to work on a ladder with live circuits |
Notice that the two paths overlap in the middle. A simple swap in a fan-rated box is genuinely within reach of a careful homeowner who has done basic electrical work before. A new install, a vaulted ceiling, or an older home is almost always worth paying a professional to handle.
How to prepare the room and the fan
A small amount of preparation before the electrician arrives saves a surprising amount of time. The most useful steps are straightforward:
- Move furniture away from the install area. A clear floor under the fan gives the electrician room to set up a ladder and a drop cloth without scratching a hardwood floor or a rug.
- Open the fan box and confirm that every part is included. Blades, blade irons, the light kit, the pull chains, the downrod, the mounting bracket, and the hardware bag should all be present.
- Locate your electrical panel and make sure the breakers are labeled. The electrician will need to turn off the correct circuit, and a labeled panel makes that step fast.
- Decide on the switch configuration ahead of time. If you want the fan and the light on separate switches, the wiring has to support that. If it does not, the electrician may be able to add a second switch or recommend a remote-control module instead.
- Have a stool or short ladder ready for any post-install adjustments, such as rebalancing a blade or testing the remote.
If you are replacing an existing fan, take a photo of the current wiring before the electrician removes it. That photo is useful if you ever need to troubleshoot, and it gives the electrician a quick reference for the existing circuit.
Questions to ask when you book the visit
Most electricians are happy to walk through the job on the phone before scheduling. A few specific questions make the conversation more useful and help you compare quotes between contractors.
- Is the visit charged by the hour or as a flat rate, and what does the flat rate include?
- Does the quote cover the fan-rated box if the existing one needs to be replaced?
- Is there an extra charge for high or vaulted ceilings?
- Will the electrician handle the permit, or is that the homeowner’s responsibility?
- What happens if the existing wiring is not up to code? Is there a separate quote for that work, or is it billed by the hour?
- Is the work warrantied, and for how long?
Flat-rate quotes are common for simple swaps and make the cost predictable. Hourly billing is more common when the scope is unclear, such as in an older home where the wiring condition is unknown. Either approach is reasonable, as long as you understand which one you are getting.
What to do if the existing wiring is a surprise
Older homes sometimes reveal issues once the old fixture comes down. The most common surprises are fabric-insulated wire, a missing ground, or a box that is not anchored to a joist. None of these are emergencies, but they do change the scope of the work.
A good electrician will stop, show you what they found, and give you a price for the additional work before continuing. That is the right time to ask whether the additional work needs a permit, how long it will add to the visit, and whether the fan can be safely installed in the same visit or whether a follow-up is required.
It is also worth asking whether the issue is isolated to the fan location or a sign of a broader wiring problem. A single missing ground at one box is a small fix. Missing grounds at every box in the room is a sign that the branch circuit may need more substantial work, and a separate visit for that is usually the right call.
Special cases worth flagging
A few install scenarios sit outside the standard swap and are worth thinking through ahead of time.
| Scenario | What changes | Typical impact on cost and time |
|---|---|---|
| Vaulted or angled ceiling | Needs an angled mounting kit and a specific downrod length | Adds $20 to $50 in materials and 30 to 60 minutes |
| Two-story foyer or high ceiling | Requires a taller ladder and a second person for safety | Adds 30 to 90 minutes, sometimes a small labor surcharge |
| Outdoor or covered patio fan | Needs a wet-rated or damp-rated fan and a fan-rated box rated for the location | Fan price is higher; installation is otherwise similar |
| Smart fan with built-in Wi-Fi | May need a neutral wire at the switch for the module to function | Neutral is usually present; otherwise, an extra wire needs to be pulled |
| Old home with knob-and-tube or aluminum wiring | May need a special connector or a small repair to the branch circuit | Adds 30 to 60 minutes and a small materials cost |
None of these are deal-breakers, but they are useful to mention when you book so the electrician brings the right parts and the right ladder.
After the install: small steps that keep the fan running smoothly
A ceiling fan that is installed correctly is a low-maintenance appliance, but a small amount of attention in the first few weeks keeps it that way.
- Listen for humming or clicking. A faint hum on the highest speed is normal. Clicking usually means a blade is loose or a blade iron is not seated fully.
- Wobble in the first day or two is common and is almost always fixed with the included balancing kit. After a week, persistent wobble usually points to a downrod issue or a mounting bracket that is not flush.
- Dust the blades every few months. Dust buildup is the most common cause of a fan that looks like it is off-balance over time.
- Reverse the direction seasonally. Most fans have a switch on the motor housing that flips between summer and winter modes. The correct setting depends on whether you want the fan to push air down or pull it up.
If the fan starts to make new sounds, wobble persistently, or trip a breaker, the right next step is to turn it off and call the electrician back. Those symptoms usually point to a loose connection, a failing motor, or a balance issue that the balancing kit cannot fix, and they are easier to address early than after they have been running for months.
A short checklist for booking the job
Before you call, run through this list. It captures the information an electrician will ask for and the decisions you will need to make.
- Is there an existing fixture at the install location, and is the box fan-rated?
- Is the ceiling flat, vaulted, or extra high?
- Do you want the fan and the light on the same switch or on separate switches?
- Is the fan already purchased, and is it assembled?
- Is there easy access to the electrical panel, and are the breakers labeled?
- Is there a parking spot close to the entrance, especially for high-ceiling jobs that require extra gear?
Having answers to these ready when you call lets the electrician give you a real quote on the first call, and it makes the visit itself faster and more predictable.
For a routine swap, hiring an electrician to install a ceiling fan is one of the more straightforward service calls in a home. The work is well understood, the time required is short, and the difference between a careful install and a rushed one is visible the first time you turn the fan on. A licensed electrician brings the right box, the right connectors, and the right expectations, and the result is a fan that runs quietly and safely for years.
Before scheduling, it can help to read through a practical breakdown of what the job includes, such as this moving container guide that explains how to evaluate a service call before booking. For homeowners who also want to keep up with seasonal maintenance around the house, the laundry dryer vent cleaning guide is a useful companion read on small jobs that pay off in safety and reliability.
Frequently asked questions
Do I need an electrician to install a ceiling fan if I already have a light fixture there?
Not always. In many jurisdictions, a homeowner is allowed to replace an existing light fixture with a ceiling fan, as long as the existing box is fan-rated and no new wiring is being added. That said, the existing box is often not fan-rated, and the safer move is to have a licensed electrician confirm the box and the wiring before you start.
How much does it cost to have an electrician install a ceiling fan?
For a straightforward swap with no new wiring, most homeowners pay between $150 and $400 in labor, with the national average around $250. New wiring, vaulted ceilings, and older homes push the price higher. The fan itself is a separate cost and varies widely by brand and size.
How long does it take an electrician to install a ceiling fan?
A simple swap in a fan-rated box usually takes 60 to 90 minutes. A box replacement adds roughly 20 to 30 minutes. Running new wire, installing a brace in a ceiling with no fixture, or working on a vaulted ceiling can push the visit to two or three hours.
Can a handyman install a ceiling fan instead of a licensed electrician?
In some areas, a handyman can do a like-for-like swap with no new wiring, but most jurisdictions require a licensed electrician for any new circuit, new cable, or permit-bearing work. If the job is more than a simple swap, a licensed electrician is the safer choice and is usually required by code.
What if my existing ceiling box is not fan-rated?
The electrician will replace the box with a fan-rated one, either by attaching it directly to a joist or by installing a listed brace through the existing hole. This is a routine fix and usually adds about 20 to 30 minutes and a small materials cost to the visit.
Is it safe to install a ceiling fan without a ground wire?
Modern fans are designed to be grounded, and the National Electrical Code requires a grounding path for the fan. If the existing branch circuit does not have a ground, the electrician can sometimes run a separate ground wire back to the panel or recommend a small repair to the branch circuit before installing the fan.
Can one ceiling fan be controlled by two separate wall switches?
Yes, but the wiring has to support it. The ceiling box needs an additional conductor so that the fan and the light kit can be switched independently. If the existing box only has the standard hot, neutral, and ground, the electrician can sometimes pull a new wire or recommend a remote-control module as an alternative.
Do I need a permit to install a ceiling fan?
It depends on the scope and on local rules. A like-for-like swap in a fan-rated box usually does not require a permit. New wiring, a new circuit, or any work that involves opening the wall typically does. A licensed electrician will know the local requirements and can pull the permit if it is needed.
What size ceiling fan do I need for my room?
For rooms up to about 75 square feet, a fan in the 29 to 36 inch range works well. For rooms between 75 and 144 square feet, look at 36 to 42 inch fans. For rooms between 144 and 225 square feet, 44 to 50 inch fans are typical. Larger rooms often need 50 inch fans or two fans spaced across the room.
How do I know if my ceiling can support a ceiling fan?
The box has to be fan-rated, and it has to be anchored to a joist or to a listed brace rated for fan use. A standard plastic or light-fixture box is not enough. If you are not sure what is in your ceiling, an electrician can pull the existing fixture and confirm in a few minutes before starting the install.
Leave a Reply