
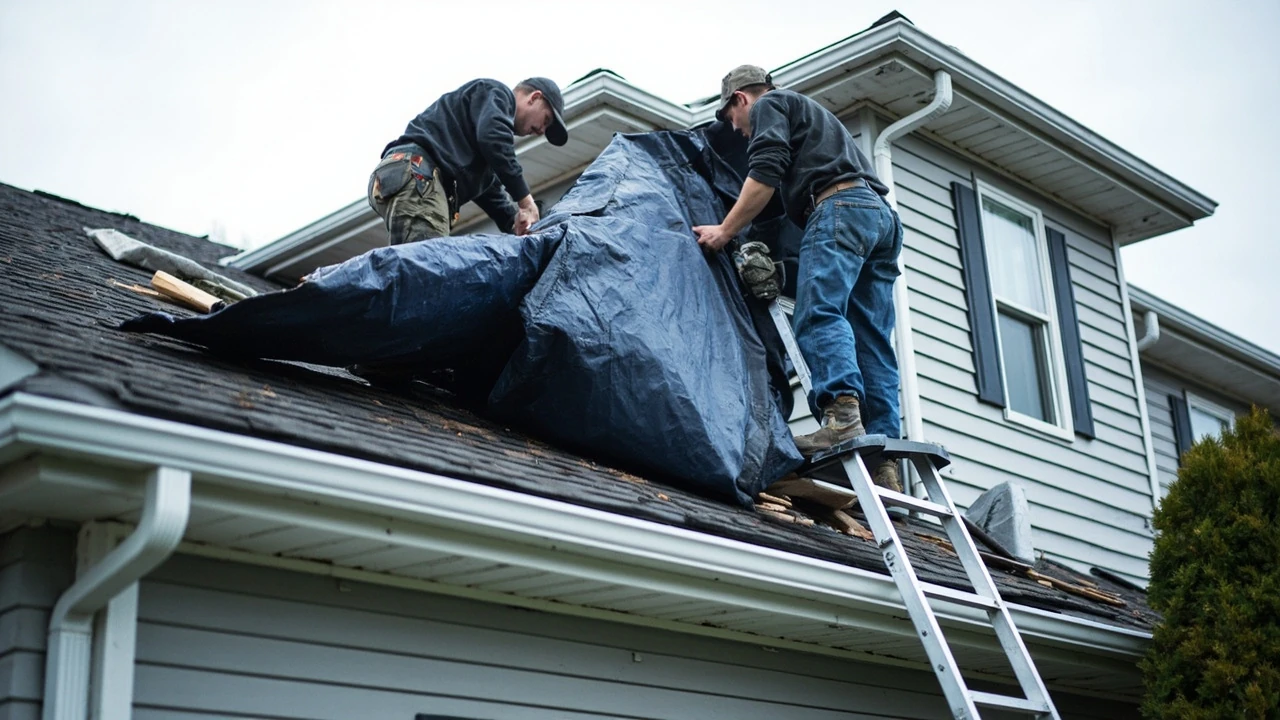
Roof tarping after storm damage: what to do and what to expect
A thunderstorm rolled through at 11 p.m. and the next morning you notice a wet ceiling, a missing patch of shingles along the ridge, and a soft spot in the attic decking. The roof is no longer keeping water out, and every hour that passes lets more of it reach the insulation, the drywall, and the framing. In that window, professional roof tarping is usually the fastest way to stop the bleeding until a permanent repair or full replacement can be scheduled.
Tarping a roof is not glamorous work, and it is not a fix. It is a temporary waterproof cover installed over a damaged section so that rain, wind-driven moisture, and debris stop entering the home. Done correctly, an emergency tarp can hold for weeks. Done badly, it can channel water straight into the wall cavity or blow off in the next gust, turning a manageable problem into a much larger one.
This guide walks through what roof tarping actually is, when it is the right call, how a professional installation is done step by step, what it typically costs, and what homeowners should document for an insurance claim. It is written for U.S. homeowners dealing with a recent storm, a tree strike, an aging roof that finally let go, or a contractor who has left an opening that needs to be closed before the next rain.
What roof tarping is and when it makes sense
Roof tarping is the installation of a heavy-duty waterproof sheet, usually polyethylene, over a damaged or exposed section of a roof to keep water out until permanent repairs can be made. The tarp is anchored with lumber, screws, and fasteners so it can resist wind lift and channel runoff off the damaged area rather than into it.
It is considered an emergency, time-limited measure. Industry guidance and most roofing contractors treat a tarp as a bridge, not a cure, with a useful life of roughly 30 to 90 days depending on the material, exposure, and installation quality. A tarp is appropriate when:
- A storm, falling limb, or wind event has removed shingles, flashing, or a section of decking.
- A fire or impact has opened the roof envelope and the home is still weather-tight enough to occupy safely.
- A contractor has stripped part of the roof and a sudden weather change is forecast before work can continue.
- Water is actively entering the home and a permanent repair cannot be scheduled within days.
It is generally not appropriate when the structural framing is unsafe, when the roof is so compromised that climbing on it would be dangerous, or when the only issue is cosmetic aging without active leaks. In those cases, a contractor inspection and a permanent repair plan are the right next step instead.
Common situations that lead to emergency tarping
Most emergency tarp calls fall into a handful of recurring patterns. Knowing which category you are in helps you describe the problem accurately when you call and helps the crew bring the right materials.
- Wind damage: Straight-line winds and gusts lift shingles, expose nail rows, and sometimes peel back flashing along eaves and rakes.
- Hail damage: Hail knocks the protective granules off asphalt shingles, bruises the mat, and in severe cases punches holes that leak with the next rain.
- Fallen limbs or trees: A branch can crack shingles, tear underlayment, or punch through decking. A full tree strike can take out a large section of roof.
- Failed flashing: Old or improperly installed flashing around chimneys, vents, skylights, and valleys eventually lets water in, sometimes slowly enough that the damage inside is much larger than the hole outside.
- Deferred maintenance: A roof at the end of its service life can start to lose tabs and shingles long before a full replacement is scheduled, especially after a hard rain.
In all of these cases, the immediate goal is the same: keep water out of the structure. The permanent fix may be a small repair, a partial re-shingle, or a full replacement, but the tarp is what buys you time to make that decision without more damage happening in the meantime.
Why professional installation usually beats a DIY tarp
It is technically possible to buy a tarp at a hardware store, climb up a ladder, and toss it over the damaged area. The result almost always looks like it, and it can fail at the worst possible time. A few differences between a homeowner tarp and a professional one are worth understanding.
| Factor | DIY tarp | Professional roof tarping |
|---|---|---|
| Material weight | Lightweight 5-8 mil consumer tarp | Heavy-duty 10-20 mil woven poly tarp rated for outdoor exposure |
| Anchoring | Sandbags, bungee cords, or nails through the tarp | Wooden battens screwed into the structure, often with sandbags or weighted boards at the base |
| Wind resistance | Low; acts like a sail in the next gust | High; batten strips distribute load and reduce flutter |
| Water management | Often channels water under the tarp into the home | Lapped and weighted so water runs off away from the opening |
| Safety | Homeowner on a ladder in sneakers | Trained crew with harnesses, roof footwear, and fall protection |
| Documentation | Few or no photos | Photos before and after, often used directly in the insurance claim |
| Useful life | Days to a couple of weeks | Often 30 to 90 days or more, depending on exposure |
The safety angle alone is enough reason to think carefully. Wet shingles, a soft spot in the decking, and a ladder set on uneven ground are a common recipe for an emergency room visit. A professional crew arrives with fall protection, roof-friendly footwear, and a clear process, which is why most homeowner insurance carriers specifically accept or even prefer a professional tarp when it is reasonable and necessary to prevent further damage.
How professional roof tarping is actually done
The details vary by roof type and damage pattern, but a competent emergency tarp follows a fairly predictable sequence. Understanding the steps makes it easier to evaluate a quote and to spot work that is being cut short.
- Damage assessment from the ground and attic: The crew walks the perimeter, looks for soft decking, and, when possible, checks the attic for active drips, daylight, and water lines on the underside of the sheathing.
- Photo documentation: Before anyone climbs, the crew photographs the damage from multiple angles. These images often become part of the insurance file.
- Safety setup: Harnesses, anchors, and a stable ladder are set up. A spotter is usually on the ground.
- Debris removal: Loose shingles, branches, and torn flashing are pulled back so the tarp sits flat. Nails sticking up are hammered down or pulled.
- Tarp sizing and placement: The tarp is cut so it overlaps the damaged area by several feet in every direction and extends past the ridge when the damage is high on the roof. Wrapping over the ridge and down the other side is the most watertight approach for damage near the top.
- Anchoring with battens: The tarp is secured with wooden strips, usually 1×2 or 1×3 lumber, screwed through the tarp into sound decking or framing. The battens hold the tarp flat and distribute wind load.
- Sealing and weighting the edges: Edges are folded, weighted, or tucked under shingles to keep wind from getting underneath. On lower slopes, sandbags or weighted boards may be added at the base.
- Final check and photos: The crew inspects the install from multiple angles, confirms water will shed in the right direction, and photographs the finished work.
The whole process for a typical single-family home is often a few hours once the crew is on site. Larger damage, multi-story homes, or steep-slope roofs can push the job to most of a day.
How long a tarp actually lasts on a roof
The lifespan of a tarp on a roof depends on three things: the material, the exposure, and the quality of the installation. A For additional context, heavy-duty woven polyethylene tarp installed with proper battens on a moderate-slope roof in a calm climate can easily last 90 days or more. The same tarp in a high-wind coastal area or under heavy tree cover may degrade faster.
| Tarp type | Typical useful life on a roof | Best use case |
|---|---|---|
| Lightweight 5-8 mil consumer tarp | 1-3 weeks | Very short bridge while waiting for a repair crew |
| Standard 10 mil poly tarp | 30-60 days | Most single-family emergency tarping jobs |
| Heavy-duty 12-20 mil woven poly tarp | 60-120 days or more | Long lead times before insurance approval or full replacement |
| Reinforced vinyl-coated tarp | Several months | Commercial jobs, very long lead times, harsh sun exposure |
Sun is the main enemy of any polyethylene tarp. UV breaks down the material over time, and a south-facing slope in full sun will age a tarp faster than a shaded north slope. Wind is the second enemy, because flutter and lift eventually stretch and tear the material. A properly battened install dramatically slows both.
What roof tarping typically costs in the U.S.
Costs vary by region, roof pitch, height, and the size of the damaged area, but a few ranges are common enough to be useful when you are budgeting. The figures below reflect typical homeowner-paid pricing in many U.S. markets and are not quotes; actual costs depend on local labor rates, material availability, and the scope of the job.
| Job type | Typical price range | What’s usually included |
|---|---|---|
| Small patch tarp (single-story, low slope, under 100 sq ft) | $300-$700 | One heavy-duty tarp, battens, basic photo documentation |
| Standard emergency tarp (typical two-story, 100-300 sq ft) | $700-$1,500 | Larger tarp or multiple pieces, ridge wrap if needed, fasteners, photos |
| Large or complex tarp (steep slope, multi-story, or 300+ sq ft) | $1,500-$3,000+ | Custom fit, additional lumber, harness work, sometimes a small crew for a full day |
| After-hours or emergency dispatch premium | Add 25-100% on top of base rate | Evening, weekend, or active-leak calls outside normal hours |
Many homeowner insurance policies treat emergency tarping as a reasonable expense to prevent further damage, and it is commonly reimbursable as part of a storm claim. Keep every receipt and ask the contractor for before-and-after photos so you have a clean paper trail for your adjuster.
What to do in the first hour after roof damage
The first hour after you notice a leak or storm damage is when most additional damage happens, and a few calm steps now can save a lot of money later. Most emergency roofing services are designed around this window, and the crew that shows up will follow a similar playbook to the one below.
- Move people, electronics, and valuables out of the affected rooms. Water and electricity are a bad mix. If the ceiling is bulging, a controlled poke with a screwdriver can drain a small amount into a bucket before it spreads.
- Photograph everything. Ceilings, walls, floors, furniture, and the outside of the roof if you can see the damage safely from the ground. Time-stamped photos are useful for the claim.
- Contain the water. Buckets, towels, a wet/dry vac, and a piece of plywood with a hole for a bucket can keep a small leak from becoming a large one.
- Call your insurance carrier to open a claim or notify them of intent. Many carriers ask that you take reasonable steps to prevent further damage, which is exactly what tarping does.
- Call a licensed roofing contractor that offers emergency tarping. Describe the damage, the roof type, the height, and whether water is still entering. Ask about response time, photo documentation, and whether they can meet the adjuster on site.
- Save every receipt. Hardware store buckets, fans, a dehumidifier rental, the tarp invoice itself. These are commonly reimbursable under “mitigation” or “loss prevention” coverage.
What you should not do is climb on a wet or damaged roof yourself, ignore a ceiling bulge until it collapses, or cover the damage with interior paint before the adjuster sees it. A reasonable, documented mitigation effort protects both the home and the claim.
Roof tarping and the insurance claim
Insurance is rarely the first thing on a homeowner’s mind at 2 a.m. with a bucket under a drip, but it shapes almost every decision in the days that follow. A few specifics worth knowing:
- Emergency tarping is typically covered. Most standard homeowner policies treat reasonable steps to prevent further damage as a covered expense under the dwelling or loss-protection portion of the policy, especially after a named storm or covered peril.
- Documentation matters more than the invoice. Before-and-after photos, a written scope of work, and a copy of the contractor’s invoice are what an adjuster needs to approve the line item.
- Use a contractor who is comfortable with insurance work. Roofers experienced in storm claims know what adjusters look for and can often meet the adjuster on site to point out damage that is easy to miss from the ground.
- Do not let the tarp delay the permanent repair indefinitely. Carriers expect a reasonable timeline from mitigation to permanent repair. A few months is usually fine; a year of tarps can become a coverage issue.
- Keep damaged materials when possible. An adjuster may want to see the torn shingle, the failed flashing, or the branch that came down. Photograph them in place before cleanup.
If you are working with a contractor who handles the full claim, ask how they document the install, whether they will meet the adjuster, and how they break out the tarp line item from the future repair or replacement.
What a good tarping contractor looks like
Roof tarping is a small job in dollar terms, but it is also the first job most homeowners do with a roofer after a stressful event. A few signals of a quality contractor:
- They answer the phone, give a realistic arrival window, and show up when they say they will.
- They describe the scope in plain language and put it in writing, including a description of the damaged area and the size of the tarp.
- They photograph the damage before and after, and they share those photos with you.
- They carry general liability and workers’ compensation insurance and can send a certificate on request.
- They use heavy-duty tarps and proper anchoring, not a draped blue sheet and a few bricks.
- They explain the next step, whether that is a simple repair, a larger re-shingle, or a full replacement, and they are clear about what the tarp will and will not do.
A contractor who pressures you to sign a full replacement contract before the adjuster has even seen the roof, or who insists on cash for the tarp with no written scope, is a red flag at any stage of the process.
Safety and limitations of roof tarping
Tarping is useful, but it has real limits that are worth respecting. A tarp does not restore structural integrity to rotted decking, does not fix failed flashing, and does not stop mold growth in insulation that is already wet. It also cannot make a dangerous roof safe to walk on, and a tarp installed on a roof that should not be walked on is a sign that a different approach is needed.
Other limits to keep in mind:
- Tarp seams are weak points. A single large tarp with no seams is better than several smaller ones pieced together.
- Tarp edges can channel water in the wrong direction if the installer does not think about the slope and runoff path.
- Flapping and wind noise are normal in the first day or two as the tarp settles, but persistent flapping usually means the anchoring needs adjustment.
- A tarp is not a roof. If you start to see daylight around it, water pooling on top of it, or new stains inside the home, call the contractor back.
If the home is unsafe to occupy because of structural damage, electrical risk, or active interior flooding, the right call is often a mitigation company with water-damage equipment, not a roofer with a tarp. Tarp first, dry out second, repair third is the usual order, but the order depends on what the home actually needs.
Frequently asked questions
How long can a tarp stay on a roof?
A professionally installed heavy-duty tarp on a typical residential roof can last 60 to 90 days or longer, and reinforced tarps can last several months. The lifespan depends on sun exposure, wind, and installation quality. Most contractors plan on a few months of useful life, which is usually enough time to get an insurance inspection and schedule a permanent repair or replacement.
Will my homeowner’s insurance pay for emergency roof tarping?
In most cases, yes. Standard homeowner policies typically cover reasonable emergency steps to prevent further damage after a covered peril such as wind, hail, or a fallen tree. The tarp line item is usually reimbursable as part of a storm claim when it is properly documented with photos and a written invoice. Policies vary, so it is worth calling your carrier to confirm how they handle mitigation expenses.
Can I tarp my own roof after a storm?
It is physically possible, but most roofing professionals and insurance carriers do not recommend it. Wet shingles, soft decking, ladders on uneven ground, and a damaged roof surface are a common source of fall injuries. A homeowner who is comfortable on a roof, has a helper, and is facing a small, easy-to-reach patch in calm weather can sometimes manage a short-term tarp. For anything beyond that, a professional install is safer and usually lasts longer.
What size tarp do roofers actually use?
Most emergency tarps installed by roofers are in the 20 by 30 foot to 30 by 40 foot range, often 10 to 20 mil thick, made of woven polyethylene. They are usually larger than the damaged area so they can be wrapped over the ridge and anchored several feet past the opening in every direction. Smaller tarps are used for tight spots, and very large jobs may use multiple tarps joined or battened together.
How much does roof tarping cost on average?
For a typical single-family home, a single emergency tarp usually falls somewhere between a few hundred dollars and around $1,500, with after-hours or large jobs running higher. The main drivers of cost are the size of the damaged area, the height and pitch of the roof, the type of tarp material used, and whether the call is during normal hours or an emergency dispatch. Getting a written scope and photo documentation is more important than chasing the lowest price.
Is roof tarping the same as a temporary roof repair?
Not exactly. A temporary roof repair usually means replacing a small section of shingles, flashing, or underlayment so the roof is watertight in its own right for a longer period. A tarp is a covering on top of the existing roof surface, not a repair of the roof itself. Tarping buys time; a temporary repair begins the actual fix. In practice, the two are sometimes combined, with a tarp installed first and a small repair done once materials are available.
What should I document before and after tarping?
Before the crew arrives, photograph the interior damage, the affected rooms, the outside of the roof from the ground, and any debris that fell. Save receipts for anything you buy to mitigate damage, such as buckets, tarps of your own, fans, or a dehumidifier rental. After the tarp is installed, ask the contractor for a written scope of work, an invoice, and before-and-after photos, and forward those to your insurance adjuster as part of the claim file.
Can a tarp handle snow and freezing weather?
A tarp can handle light snow and freezing, but heavy snow loads, ice dams, and the freeze-thaw cycle all shorten its useful life. If a major storm is in the forecast, it is worth asking the contractor whether the tarp is installed to shed snow or whether it should be removed or reinforced before the storm. In regions with long, severe winters, a permanent repair before the first snow is usually the safer bet.
Who do I call first, a roofer or my insurance company?
If water is actively entering the home, the priority is to stop the water, which usually means calling a roofer that offers emergency tarping. If the damage is stable and you can safely wait a few hours, calling your insurance carrier first to open a claim or notify them of intent is reasonable. In practice, most homeowners do both: a quick call to the insurer to start the paper trail and a call to a roofer to get someone on site.
What happens after the tarp is on?
Once the roof is watertight, the next steps are a full damage inspection, a meeting with the insurance adjuster if a claim is open, and a written plan for either a targeted repair or a full replacement. The tarp gives you time to get multiple quotes, choose materials, and schedule the work without more water entering the home. Most homeowners keep the tarp in place until the permanent work is scheduled, and the contractor removes it as part of that job.
A practical next step if you are staring at a wet ceiling right now
If you are reading this in the middle of a leak, the path forward is short. Move people and valuables out of the affected room, photograph what you can see safely, contain the water with buckets and towels, and call a licensed roofing contractor that offers emergency tarping in your area. Ask specifically about response time, photo documentation, and whether the crew can meet your insurance adjuster on site when the claim is opened.
If you are still in the calm before a storm or at the start of a long-overdue reroof, use the same checklist as a planning tool. Walk the roof from the ground with binoculars, look for missing or curled shingles, check the flashing around chimneys and vents, and ask a roofer to walk it with you before something fails. A tarp is a useful emergency tool, but the real goal is a roof that does not need one.
For a closer look at how a professional emergency tarping job is scoped and what to expect on the day of service, the Michigan-based emergency tarping service page from Roofing Army describes a typical installation process in practical terms. On the home side of things, a recent project like the bathroom cleaning services overview on Home Revive Group is a useful reminder that small, well-documented jobs are often the ones that prevent the bigger ones later, whether the issue is a hidden leak in a wall or a missing patch of shingles on the roof.
Leave a Reply