
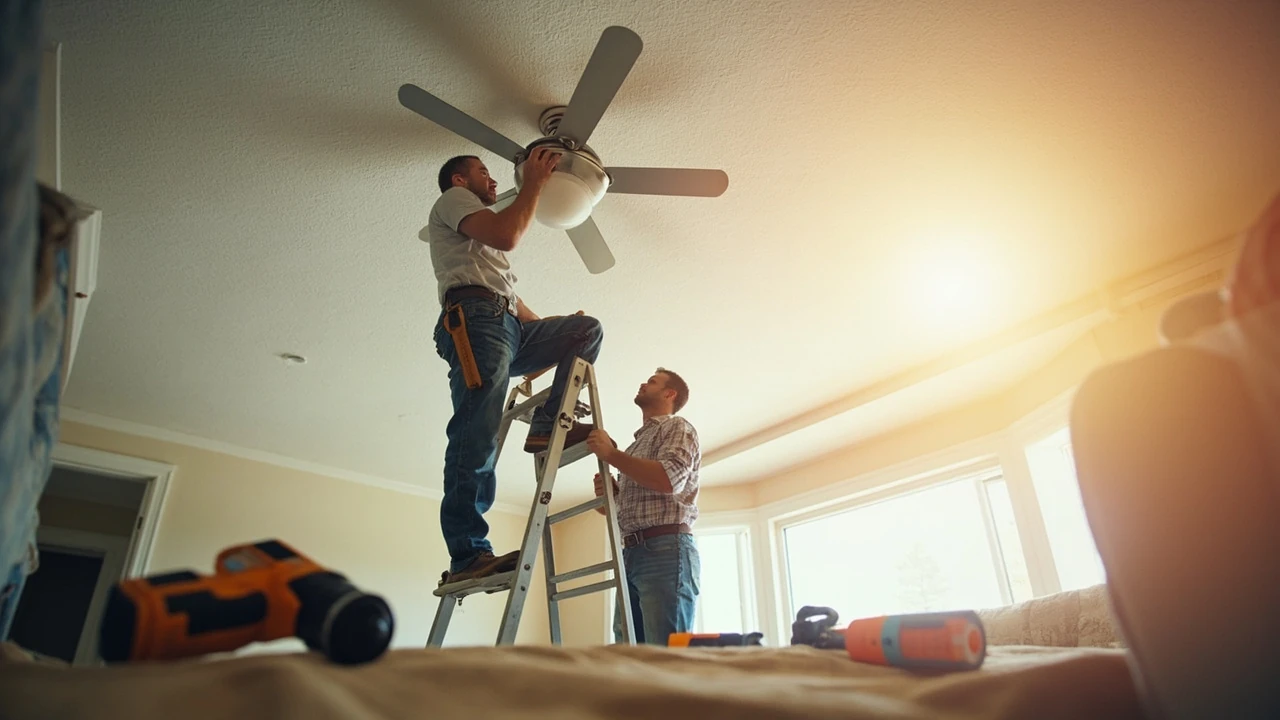
Ceiling fan installation service: what to expect and how to choose
A ceiling fan installation service covers more than lifting a fan onto a ceiling box. A real appointment usually includes a short electrical check, the right mounting hardware for your ceiling type, careful assembly of the blades and light kit, and a final test of the reversing switch and remote. Knowing what is in the scope, what tends to be billed separately, and which questions to ask before booking can save a homeowner several hundred dollars and a return visit from the technician.
This guide walks through how professional ceiling fan installation is normally priced and scheduled, which factors push the price up, what the installer should verify before drilling, and how to decide whether a handyperson, a licensed electrician, or a dedicated fan installer is the right fit for your home. It is written for a U.S. audience that is comparing options and trying to avoid a botched job, a hidden fee, or a fan that hums.
What a ceiling fan installation service actually includes
The term ceiling fan installation service is used loosely, and the scope varies by company. A small handyman may simply arrive, swap one fan for another in an existing box, and leave. A full-service electrical contractor will typically run through a longer checklist. Understanding the difference matters when you compare two quotes that look hundreds of dollars apart but are actually describing different jobs.
A standard residential appointment usually covers the items below. Anything outside this list is often treated as an add-on and should be confirmed in writing before the visit.
- Shut-off and verification of the correct circuit at the breaker panel.
- Inspection of the existing ceiling electrical box and confirmation that it is fan-rated.
- Removal of the old fixture, where applicable, and safe disposal.
- Assembly of the new fan: downrod, motor housing, blades, and any light kit.
- Mounting bracket installation and secure attachment of the fan body to the rated box.
- Wiring of line, neutral, and ground conductors, plus any switch loop or remote receiver.
- Functional test of fan speeds, direction switch, light, and remote pairing.
- Basic cleanup of packaging and debris from the work area.
Some companies also include a short walkthrough of how to use the pull chains, the wall control, or the app. That is worth asking about, especially if you have never used a reversing switch before. Reversing direction by season is a small habit that pays off in energy savings, and the history and operation of the modern ceiling fan explains why the direction switch exists in the first place.
Typical pricing and what drives the cost
Most U.S. homeowners will see a single-fan install quoted in the range of roughly $150 to $500 for labor, with the national average landing near the middle of that band. That figure changes with ceiling height, wiring condition, and whether new electrical work is needed. Treat any single number you read online as a starting point rather than a final price, because labor markets and material costs shift by region and year.
To make sense of a quote, it helps to know which factors installers actually adjust for. The table below breaks down the common drivers. None of these line items is a hidden fee in a well-run company; they are simply the variables that a real technician has to think through before giving a fixed price.
| Cost driver | What it means in practice | Typical effect on the quote |
|---|---|---|
| Ceiling height | Standard 8 to 9 ft ceilings are routine. Vaulted, two-story foyers, and ceilings above 10 ft require taller ladders or scaffolding. | Moderate to high increase for anything above 10 ft. |
| Existing box rating | An old plastic or undersized box must be swapped for a fan-rated brace box that can hold the dynamic weight of a spinning fan. | Small to moderate add-on if the box needs replacement. |
| New wiring or switch loop | Running a new wire, adding a wall control, or relocating a switch involves opening drywall and fishing cable. | Significant add-on, sometimes more than the install itself. |
| Fan already assembled vs. flat-packed | A fan that arrives partially assembled in the box is faster to install than a flat-packed unit with many small parts. | Small variation in labor time. |
| Heavy or specialty fan | Large downrod fans, smart fans with proprietary receivers, and outdoor-rated fans take longer to wire and balance. | Moderate to high increase, especially for outdoor units. |
| Removal of an old fan or heavy light | Detaching and disposing of an old, oversized fixture can add time, especially with old wiring. | Small to moderate add-on. |
| Region and travel | Metropolitan areas and rural long-distance service calls both tend to push labor rates. | Varies by market. |
A single quote that looks high is not necessarily inflated. The same job, in the same home, can be quoted very differently by a one-person handyman and by a licensed electrical contractor with insurance and warranty. The price difference usually reflects a real difference in scope, paperwork, and accountability.
DIY vs. handyman vs. licensed electrician
Not every ceiling fan needs a professional. A confident homeowner with basic electrical experience, the right ladder, and a fan-rated box already in place can often handle a straightforward swap. Other situations are better left to a pro. The lines between the three typical options are not always obvious, so the comparison below may help you decide where your job falls.
| Option | Best suited for | Limitations to consider |
|---|---|---|
| Homeowner DIY | Like-for-like fan swap on a standard 8 to 9 ft ceiling with an existing fan-rated box and working switch. | No warranty on labor, no insurance coverage if something goes wrong, and the homeowner assumes responsibility for code compliance. |
| Handyman service | Routine fan swaps, simple light kit additions, and ceiling boxes that need a basic brace replacement. | Licensing rules vary by state and municipality. Some jurisdictions require a licensed electrician for any new wiring, even on a swap. |
| Licensed electrician or fan specialist | New wiring runs, vaulted or high ceilings, smart fan integration, outdoor fans, and any case where the existing wiring is unknown or old. | Higher hourly rate, but the work is typically permitted where required and backed by labor warranty. |
If your job requires a permit in your jurisdiction, that almost always needs a licensed contractor. Pulling a permit yourself as a homeowner is possible in some areas, but a service that advertises as a ceiling fan installation service will often handle the permit paperwork for you, which removes one more step from your plate.
What a professional should check before mounting the fan
Good installers do most of their thinking before they ever lift a fan off the ground. There is a small list of items they should walk through during the first few minutes of the visit, and it is reasonable to expect each one to happen. You do not need to hover, but a quick observation can tell you whether the job is in good hands.
- Confirm the breaker is off and the wires are dead with a non-contact voltage tester, not just by flipping a switch.
- Inspect the existing ceiling box and verify that it is fan-rated, meaning it can hold at least 35 to 70 pounds of dynamic load. A box that is only rated for a static light fixture is a common hidden hazard.
- Check the joist or support structure above the box. A fan hung from a plastic insert in drywall can come down over time.
- Look at the existing wiring. Old cloth-insulated wire, aluminum branch wiring, or ungrounded circuits may require extra work or a different approach.
- Match the downrod length to the ceiling height, especially on angled or vaulted ceilings where a longer rod is required for safe blade clearance.
- Plan the receiver location if the fan is controlled by remote or smart app, so it sits inside the canopy and not buried in the box.
These steps are not extras. They are the difference between a fan that runs quietly for a decade and one that wobbles, hums, or pulls loose from the ceiling. If the installer skips them, it is fair to ask why.
How scheduling and on-site time actually work
Most residential ceiling fan installation appointments are scheduled in a two to four hour arrival window rather than a precise time. That is not laziness on the company’s part. Earlier jobs run long, parts run short, and traffic happens. A few practical expectations are worth keeping in mind when you book.
- One standard fan on an existing fan-rated box usually takes 45 to 90 minutes once the technician is on site and the power is off.
- A new box installation, new wiring, or a vaulted ceiling can push a single-fan visit to two to three hours.
- Multi-fan projects, such as new construction or a full-home retrofit, are often priced per fan with a small discount per additional unit on the same visit.
- Asking the company to batch nearby tasks in the same visit, such as swapping a light fixture or adding a dimmer, can sometimes reduce the total trip charge.
Clear access to the work area helps the visit go faster. Moving furniture, locating the breaker panel, and having the new fan unboxed in the room where it will be installed are all small steps that cut the billable time without cutting corners.
Common add-ons and how to decide on them
For additional context, Add-on services are where ceiling fan installation quotes start to drift. Not every add-on is worth taking, and not every one is a sales trick. The list below covers the most common ones and how to think about each.
- Replacing a non-rated box with a fan-rated brace box: usually worth it. The cost is modest and the safety benefit is real, especially in older homes.
- Adding a wall control or smart switch: worth it if you want reliable control from a fixed location, but not necessary if the fan already has a good remote.
- Running a new circuit from the panel: only needed if you are adding a fan where there was no fixture, or if the existing circuit is already heavily loaded.
- Outdoor fan installation: a separate category that involves damp- or wet-rated hardware, weatherproof boxes, and often a GFCI-protected circuit. It is not the same price as an indoor install.
- Old fixture disposal: a small fee, often built into the labor, but worth confirming if you are trying to keep the project tidy.
- Post-install painting or drywall patching: usually outside the scope of a fan installer. Ask for a referral rather than expecting it in the visit.
When a company itemizes these clearly, that is a positive sign. When a single flat number is given with no breakdown, it is reasonable to ask what is included and what is not.
Safety, codes, and what “permitted” really means
The National Electrical Code, which most U.S. jurisdictions follow in some form, requires that a ceiling fan be supported by a listed outlet box that is marked for fan support. That single rule is the reason so many installations include a box upgrade. Even if your local jurisdiction does not require a permit for a like-for-like swap, the box requirement still applies for safety.
For new wiring, new circuits, and outdoor installations, a permit and inspection are commonly required. A licensed ceiling fan installation service will know the local rules and can either pull the permit or tell you when one is not needed. If you are told a permit is not required for new electrical work in a room that has no existing outlet, that is a signal to get a second opinion.
Homeowners sometimes worry about insurance. A licensed installer carries liability and workers’ compensation coverage, so if something goes wrong during the work, there is a clear path for a claim. A handyman without insurance may be cheaper up front, but the financial risk of a damaged ceiling, a small electrical fire, or a fall from a ladder shifts back to the homeowner.
How to compare two ceiling fan installation quotes
When two quotes look different, the difference is usually in one of three places: scope, credentials, or warranty. Walking both quotes through the same checklist can turn a confusing comparison into a clear decision.
- Confirm both quotes describe the same starting condition, including whether the old fan is being removed and whether the box is being replaced.
- Check whether each quote is a flat rate or an hourly estimate, and ask what counts as billable time.
- Look at the warranty. A one-year labor warranty is common; a 90-day warranty is acceptable but shorter; no warranty is a yellow flag.
- Verify licensing and insurance. Ask for the license number and a copy of the insurance certificate if it is not already on the quote.
- Read the payment terms. A reasonable deposit is normal, but a company that demands full payment before the work starts is a risk.
- Look at online reviews with a critical eye. A pattern of complaints about no-shows, surprise charges, or messy work is more telling than one or two outlier reviews.
Once the comparison is in writing, the cheaper quote often makes more sense, or the more expensive quote justifies itself. Either outcome is better than guessing.
Questions to ask before booking
A short list of good questions can clear up most of the unknowns in a single phone call. Keep this list handy when you call a company you have not used before.
- Is the quote flat rate per fan, or is it hourly with a minimum?
- What happens if the existing box is not fan-rated?
- Do you carry liability and workers’ compensation insurance, and are you licensed in this city or county?
- Is the warranty on labor, and how long does it last?
- Do you pull permits when required, and is the permit fee included in the quote?
- Can you handle smart or remote-controlled fans, and is the pairing included?
- Do you remove and dispose of the old fan, and is that included?
- What payment methods do you accept, and when is the balance due?
The quality of the answers usually tells you as much as the answers themselves. Clear, specific responses are a good sign. Evasive answers, or pressure to book before you have a written quote, are reasons to call the next company on your list.
Preparing your home for the visit
A little preparation makes the appointment faster and cheaper. None of the steps below are difficult, and they can save a return trip.
- Clear a path to the breaker panel and to the room where the fan will go.
- Move furniture and rugs out from under the work area so the installer can set up a ladder safely.
- Unbox the new fan in the room where it will be installed, and lay out the parts on a clean surface.
- Have the remote, batteries, and any app login ready if the fan is a smart model.
- Make a quick note of any other small electrical items you want addressed in the same visit, such as a dead outlet or a switch that feels loose.
- Keep pets and children out of the work area for the duration of the visit.
These steps are small, but they cut the chance of a chargeable extra hour for something a five-minute setup would have prevented.
After the install: a quick homeowner checklist
Before the installer leaves, take a few minutes to walk the job with them. This is the moment to catch small issues, and most good companies expect it.
- Test all three or four fan speeds and listen for wobble or hum. A slight wobble in the first 24 hours is common as the blades settle.
- Test the reverse direction switch and confirm the fan actually changes direction. Some fans run almost silently in reverse, which surprises first-time users.
- Check the light kit on every setting, including any dimming range, and confirm the wall switch and remote do not conflict.
- Look at the canopy against the ceiling. A small gap is normal; a large one means the bracket is not seated properly.
- Ask about the break-in period, because some manufacturers recommend running a fan on medium for a few hours before high speed to let the bearings seat.
- Save the installer’s contact information in case the wobble does not settle or a control issue shows up after a day of use.
If anything is off, raise it on the spot. Most reputable installers will fix a small issue before they leave rather than scheduling a return visit.
When a return visit makes sense
Most ceiling fan problems are not emergencies, but a few signs are worth a quick call rather than waiting. Persistent wobble after the break-in period, a burning smell, a breaker that trips when the fan is on, or a remote that only works when standing directly under the fan are all worth raising. A small ticket now is cheaper than a damaged motor or a fire risk later.
For routine issues like a noisy blade, a loose canopy screw, or a remote that needs re-pairing, the homeowner can often fix them without a service call. The installer’s walkthrough at the end of the visit is a good moment to ask which small fixes are normal and which ones warrant a callback.
Frequently asked questions
How long does a typical ceiling fan installation service take?
For a like-for-like swap on a standard 8 to 9 ft ceiling with a fan-rated box already in place, a single visit usually takes 45 to 90 minutes once the technician is on site. New boxes, new wiring, vaulted ceilings, or smart fan setup can push the visit to two or three hours.
Do I need a fan-rated electrical box for a new install?
Yes. Any ceiling fan must be mounted to a box that is specifically listed and labeled for fan support, because a spinning fan creates dynamic load that a standard light box is not designed to handle. If your existing box is plastic, undersized, or not marked for fan support, the installer should replace it with a fan-rated brace box.
Can a handyman install a ceiling fan, or do I need an electrician?
For a simple swap on a standard ceiling, a qualified handyman is often enough, but rules vary by state and city. New wiring, new circuits, outdoor fans, and any work that requires a permit usually need a licensed electrician. When in doubt, ask your local building department or pick a licensed ceiling fan installation service.
How much should I expect to pay for ceiling fan installation?
Most U.S. homeowners pay somewhere in the range of about $150 to $500 in labor for a single fan, with the national average sitting near the middle of that range. High ceilings, new wiring, smart fan setup, and box replacement all push the price up. A flat quote that includes the box, removal of the old fan, and a labor warranty tends to be the most predictable option.
Do installers remove and dispose of the old fan?
Most do, and most include disposal in the labor charge. It is worth asking during the quote call, because some companies price removal separately. If you want to keep the old fan for a spare room or a parts donor, say so before the visit so the installer does not load it into the truck.
Is a permit required to install a ceiling fan?
Many jurisdictions do not require a permit for a like-for-like swap on existing wiring, but a permit is often required for new wiring, new circuits, or outdoor fan installation. A licensed ceiling fan installation service will know the local rules and can either pull the permit or tell you when one is not needed.
What should I do if the new fan wobbles or hums?
A small amount of wobble in the first 24 hours is normal as the blades seat. Persistent wobble after the break-in period usually points to a loose blade screw, an uneven downrod, or a bracket that is not seated evenly against the ceiling. Humming often comes from a loose canopy or a receiver box rattling inside the housing. Both are worth raising with the installer while the warranty is fresh.
Can a ceiling fan be installed on a vaulted or angled ceiling?
Yes, but the downrod has to be long enough to keep the blades clear of the ceiling slope, and the mounting bracket must accommodate the angle. A standard install kit is not always enough for steep vaults, so a longer downrod is a common add-on. Ask the installer to confirm the blade-to-ceiling clearance before the fan is mounted.
Are smart ceiling fans harder to install than standard ones?
They are not harder mechanically, but they add one extra step: pairing the receiver, the remote, and any app or hub. Most ceiling fan installation services include this pairing in the visit, but it is worth asking. The receiver also has to fit inside the canopy, which is one more reason to use a properly rated, properly sized box.
What is the difference between a damp-rated and wet-rated outdoor fan?
A damp-rated fan is built for covered porches and patios where it is not directly exposed to rain. A wet-rated fan is built to handle direct rain and is required for fully exposed outdoor locations. Installing the wrong rating is one of the more common mistakes, and it shortens the life of the fan and the motor. If the location is genuinely outdoors, ask the installer to confirm the rating before mounting.
Leave a Reply