
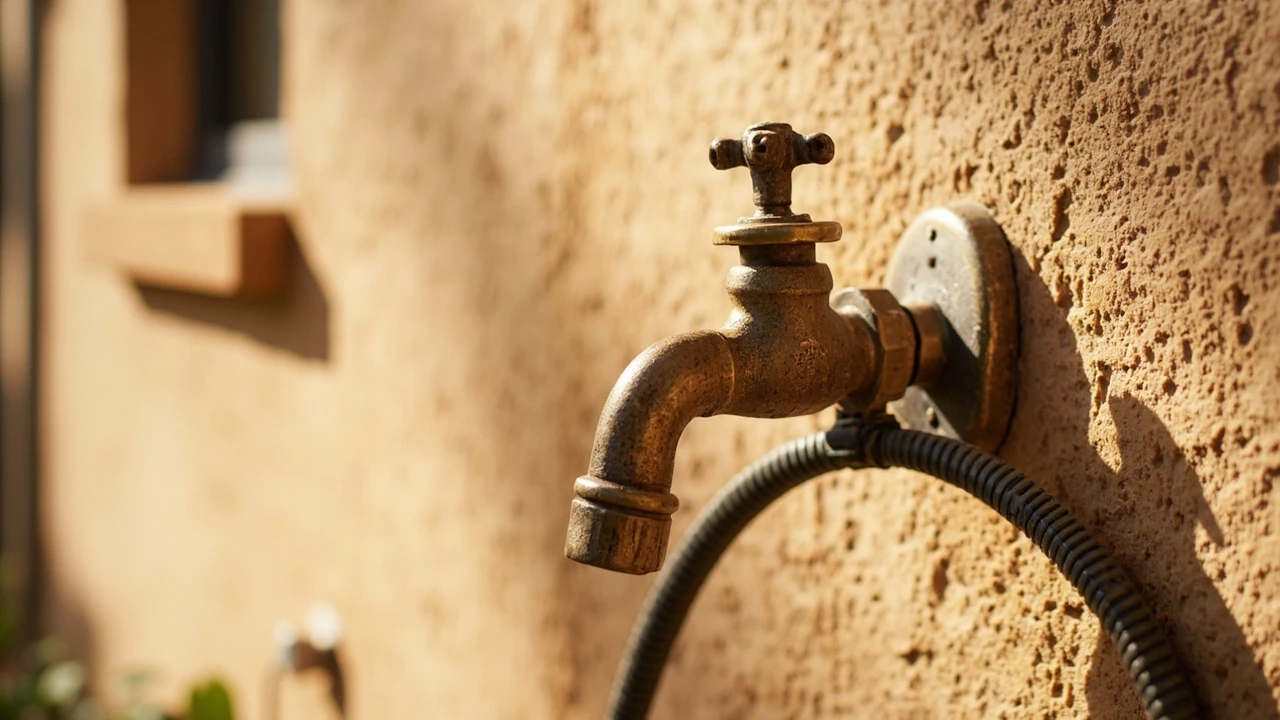
Outside water faucet: choosing, installing, and winterizing it
A frozen hose bib is one of those home problems that does not look serious until water starts pushing through drywall in January. The good news is that almost every failure tied to an outside water faucet comes down to a handful of decisions: which style of fixture was installed, how it was plumbed into the wall, and whether someone remembered to disconnect the hose before the first hard frost. This guide walks through how to pick a faucet that suits your home, how a typical installation is done, how to keep it from freezing, and what to do when one already leaks or bursts.
Before diving in, it helps to separate the words that get used interchangeably. People say “spigot,” “hose bib,” “hose bibb,” “sillcock,” and “outside tap,” and they almost always mean the same thing: the valve on the outside of the house that you screw a garden hose onto. The differences show up in the design, the length, and whether the shutoff seat lives right at the handle or several inches inside the wall.
What an outside water faucet actually does
The job of an outside water faucet is simple in principle. It lets pressurized water out of the home’s supply system and into a garden hose, a sprinkler timer, or a pressure washer, and it has to do that job through years of weather, UV, hose yanks, and winter cold.
Most residential hose bibs use one of two basic mechanisms:
- Compression (multi-turn) valve. A round handle turns a stem that pushes a rubber washer down onto a seat to stop the water. The handle typically needs two to four full turns. These are inexpensive, common, and easy to repair with a washer kit.
- Quarter-turn ball valve. A short lever turns a ball with a bored hole 90 degrees to open or close. These feel smoother, can sometimes flow more water, and tend to wear out differently than compression stems.
Beyond the internal mechanism, the rest of the design is about handling the cold. A standard hose bib has the shutoff seat right at the outside handle, so any water left in the pipe between the handle and the inside of the house can freeze, expand, and split the pipe. A frost-free sillcock moves that seat roughly 8 to 14 inches back into the heated space, so when you shut it off, the water drains out of the stem and the seat stays inside where the house is warm.
How a frost-free sillcock differs from a regular hose bib
The term “frost-free sillcock” gets used loosely. Some products labeled that way are just standard hose bibs with a longer threaded inlet. The real question is where the water actually stops when the handle is closed.
| Feature | Standard hose bib | Frost-free sillcock |
|---|---|---|
| Shutoff seat location | Right at the outside handle | 8 to 14 inches inside the wall |
| Risk if hose is left on in freezing weather | High; water sits in the stem and freezes | Lower, but only if the hose is disconnected and the stem can drain |
| Stem length | Short, usually 2 to 4 inches | Long, matched to wall thickness |
| Anti-siphon / vacuum breaker | Often a separate add-on | Often built into the outside flange |
| Typical use | Garages, mild climates, covered porches | Main exterior wall in cold climates |
A frost-free sillcock is not magic. It only protects the faucet if the stem is angled slightly downhill toward the outside, so water can empty when the valve is closed, and the homeowner actually disconnects the hose for winter. Leave a hose attached and the body of water sits all the way up to the seat, which can still freeze and crack the pipe.
Choosing the right outside water faucet for your home
Most buyers only need to match a few real-world details: the climate, the wall thickness, the pipe material inside the wall, and whether the home already has an anti-siphon vacuum breaker. The rest is mostly preference around handle style and brand.
Match the stem length to the wall
For a frost-free sillcock, the stem has to reach from the outside flange all the way through the wall sheathing, the wall cavity, and into the heated space where the seat will live. Measure from the outside surface of the siding or brick to the point where the supply pipe enters the wall, then add roughly an inch for the seat housing. Common sizes are 8 inch, 10 inch, and 12 inch. Going too long is usually fine; going too short leaves the seat in the cold zone and defeats the purpose.
Match the connection to the existing pipe
Most homes in the US have either copper, CPVC, or PEX running to the exterior wall. Each connects differently:
- Copper. A sweat (solder) connection on the inlet, sometimes with a small male adapter that solders to the supply line.
- CPVC. A solvent-weld socket that glues onto the matching CPVC pipe.
- PEX. A crimp, clamp, or push-to-connect fitting such as a SharkBite-style coupling on the inlet.
If the home has a mix, push-to-connect fittings make replacement a lot simpler, but they cost more per fitting. The same idea shows up across the plumbing aisle; homeowners shopping for car battery installation often run into the same “match the existing part, then choose a toolset” decision, and outside faucets are no different.
Pick the right outlet thread
Almost every garden hose in the US uses a 3/4 inch male garden hose thread (GHT). Most residential hose bibs are sold with a 3/4 inch MHT outlet to match. Some units also have a 1/2 inch female NPT inlet, which is the more common size for branch supply lines. If the home has a 1/2 inch supply, a 1/2 inch NPT inlet hose bib is the right match; forcing a 3/4 inch NPT inlet onto a 1/2 inch line just chokes flow.
Decide on anti-siphon protection
Building codes in many jurisdictions require a vacuum breaker on any hose bib that could conceivably have a hose attached. The breaker keeps water in the hose from siphoning back into the home’s drinking water if the pressure ever drops on the supply side. A frost-free sillcock often has the vacuum breaker built into the outside flange, while a basic hose bib uses a screw-on vacuum breaker that adds an inch or two of height.
Homeowners looking for a quick visual on the range of available designs, including quarter-turn models, frost-free units, and splitter accessories, can browse a broad selection of outdoor water spigots to see how the features line up against the wall in their own home.
Installing or replacing an outside water faucet
Replacing a hose bib is one of the more approachable plumbing jobs, but the wall side of the work is real plumbing. The outside portion is just a flange, a few screws, and some caulk. The inside portion depends on the pipe material.
Step 1: Shut off the water and relieve pressure
Find the home’s main shutoff or, if the house has a dedicated branch for the outside faucet, a local shutoff. Open the existing hose bib to drain the line and confirm pressure is gone. Keep a towel handy: a small amount of water will sit in the horizontal pipe between the shutoff and the outside wall.
Step 2: Remove the old faucet
From outside, unscrew the mounting screws that hold the flange to the siding. From inside, cut the pipe a few inches back from the old inlet, leaving clean square pipe for the new connection. For copper, that means a tubing cutter. For PEX, a small PEX cutter. For CPVC, a fine-tooth saw or a CPVC cutter.
Step 3: Prep the opening for the new stem
Make sure the hole through the wall is large enough for the new stem and any insulation you want to add behind it. A 1-inch or 1-1/8 inch hole works for most residential sillcocks. If the old hole is too small, a hole saw or a paddle bit through the sheathing will clean it up.
Step 4: Set the new sillcock with a slight downward slope
Push the new sillcock into the wall from the outside. The key detail is the slope: the outside end of the stem should sit about 1/4 inch lower than the inside end, so water drains out when the valve is closed. Check the level with a small torpedo level on top of the stem, then mark the mounting screw locations.
Step 5: Connect to the supply pipe
Make the connection based on the pipe material. For copper, clean and flux the joint, then solder it. For PEX, crimp or clamp a fitting onto the pipe and onto the sillcock inlet. For push-to-connect fittings, just push the pipe in until it seats and pull gently to confirm. Wrap male threads with two or three wraps of Teflon tape before threading the sillcock into a female adapter.
Step 6: Mount, caulk, and test
Screw the flange to the sheathing or a backing block, then run a bead of exterior-grade caulk around the flange to keep water from getting behind the siding. Turn the water back on slowly, open the new faucet, and watch the inlet and the wall for leaks while the line pressurizes. Walk back inside and check the joint from there as well.
Homeowners who do not want to solder or who are not sure which pipe material is in the wall should call a licensed plumber for the inside connection. A bad solder joint or a poorly crimped PEX fitting will leak slowly inside a wall cavity, where it can do real damage before anyone notices.
Winterizing an outside water faucet
Winterizing is not a single task. It is a habit, and a lot of homes have more than one outside faucet to think about.
Disconnect every hose
Any hose, splitter, or timer left on the spout will trap water against the valve. Even a frost-free sillcock cannot drain properly with a hose attached, because the closed valve at the end of the hose holds water in the stem. Disconnect the hose, drain it, and store it for winter.
Drain the lines you can reach
For a standard hose bib, open the valve after shutting off its supply, then leave it open at a 45-degree angle so any water inside can drain and so pressure cannot build if the pipe does freeze. For a frost-free sillcock, shut the valve, disconnect the hose, and let the stem drain by gravity.
Add an insulated cover where it helps
An insulated faucet cover, the kind that looks like a foam pillow with a drawstring, adds a layer of protection on top of everything else. It is not a substitute for disconnecting the hose, and it will not save a faucet that is already installed with the seat outside the heated wall. On a frost-free sillcock with the seat inside, a cover is a cheap extra margin against a cold snap.
Shut off and drain the dedicated branch if your home has one
Some homes have a small shutoff valve inside, often in the basement, crawlspace, or utility room, that serves only the outside faucets. After the last watering of the fall, close that valve, then go outside and open the hose bibs to drain the branch. This is the most reliable winterization for a home with multiple exterior hose bibs.
| Winterization step | Standard hose bib | Frost-free sillcock |
|---|---|---|
| Disconnect hose | Required | Required |
| Leave valve open at angle | Yes, after closing inside shutoff if available | No, close valve so stem can drain |
| Insulated cover | Helpful, not a substitute | Optional extra margin |
| Inside branch shutoff | Best practice if present | Best practice if present |
Common outside water faucet problems and what to check first
Most problems with an outside water faucet fall into a small set of categories. Walking through them in order saves time and avoids replacing parts that were never the issue.
Drip from the spout when the valve is closed
For a compression-style hose bib, a drip from the spout is almost always a worn rubber washer on the end of the stem. Shut off the water, remove the handle and the packing nut, unscrew the stem, and replace the washer at the bottom. Bring the old washer to the hardware store to match the size. A new washer and a bit of stem packing is a five-dollar fix that often solves years of dripping.
For a quarter-turn ball valve, a drip usually points to worn seals on the ball or a piece of debris stuck on the seat. These are still repairable, but it is often easier to swap the entire valve than to chase individual seal kits.
Leak around the handle
Water around the handle when the valve is open means the stem packing is worn or loose. Try tightening the packing nut clockwise a quarter turn. If that does not stop it, repack the stem with graphite packing or replace the packing washer.
Water inside the wall or stains on the ceiling below the faucet
This is the serious one. If a frost-free sillcock was installed with the stem angled slightly uphill toward the inside, water can sit in the stem instead of draining, freeze, and split the copper body just inside the wall. The fix is to open the wall, cut out the cracked section of pipe, and install a new sillcock with the correct slope. The same kind of attention to plumbing layout is why people planning a bigger renovation, like the bathroom cleaning services decision guide on the site, think about where the water actually goes.
Low water pressure at the hose
Low pressure is usually one of three things: a partially closed inside shutoff, a clogged vacuum breaker, or a kinked supply line. Unscrew the vacuum breaker on the top of the spout and check for debris. If the inside valve is fully open and the vacuum breaker is clean, the restriction is somewhere in the supply line itself.
Handle is stuck or hard to turn
Mineral buildup can lock a stem in place over years of disuse. Try a light tap on the side of the handle with a rubber mallet and a spray of penetrating oil at the packing nut. If it still will not turn, the stem is probably corroded and the whole unit is a replacement candidate.
Repair or replace: how to decide
Not every problem needs a new faucet. A simple framework helps decide which way to go.
| Situation | Likely best move | Reason |
|---|---|---|
| Drip from spout, otherwise works fine | Replace washer and packing | Cheap, restores function, keeps existing valve body |
| Valve body corroded, pitted, or visibly cracked | Replace the whole faucet | Body failure cannot be repaired with a kit |
| Leak inside the wall after a freeze | Replace with a properly sloped frost-free sillcock | Old unit did not survive; geometry needs correcting |
| Quarter-turn valve hard to open, leaks at handle | Replace the valve | Internal seals and ball wear together; whole-unit swap is faster |
| Cracked vacuum breaker cap | Replace the vacuum breaker only | It is a separate part, no need to touch the valve |
A replacement is also the right move any time the home is being re-sided, the wall thickness is changing, or the home is being converted from copper to PEX. Trying to save an old sillcock through a remodel usually costs more in labor than a new one.
Building code, permits, and when to call a plumber
Rules vary by jurisdiction, but a few patterns show up in most US codes:
- Anti-siphon protection is required on most residential hose bibs, whether built into the unit or added on.
- Frost-free sillcocks are required by code in many cold-climate jurisdictions, with the seat set inside the heated envelope of the home.
- Outside faucets that serve as a required shutoff for a washing machine or other interior fixture are not allowed in some areas; the inside fixture has to have its own shutoff.
Permit requirements also vary. Many jurisdictions treat a like-for-like hose bib replacement as routine maintenance that does not need a permit, but any work that involves opening a wall, relocating the faucet, or adding a new branch line is a permit job. A licensed plumber knows the local code and will pull permits where required. The same kind of “is this in scope for me” question comes up with home maintenance topics across the site, from laundry dryer vent cleaning to battery light on diagnostics, where a small amount of judgment separates a DIY fix from a service call.
Maintenance habits that extend the life of an outside water faucet
Most outside faucets fail because of a handful of avoidable issues. A short maintenance routine each season takes care of the rest.
- Spring: open the valve slowly, check for drips or leaks, and run water for a minute to clear any debris that settled in the line over winter.
- Summer: avoid yanking on the hose while it is pressurized, and check the vacuum breaker for spider webs or insect nests.
- Fall: shut off any interior branch valve, drain the line, and disconnect every hose and splitter before the first hard frost.
- Winter: leave standard hose bibs open at an angle and leave frost-free sillcocks closed but empty, with the hose removed.
A five-minute walk around the house in late fall is usually enough to prevent the burst pipe that shows up in February. That kind of pre-winter check, applied to other parts of the home, is a big part of why some houses never seem to have surprise repairs.
Frequently asked questions
What is the difference between a hose bib and a sillcock?
In everyday use, the two words describe the same fixture. “Sillcock” usually refers to a frost-free version with a long stem that reaches into the heated space inside the wall, while “hose bib” can mean either a basic unit or the frost-free style.
How long should an outside water faucet last?
A brass frost-free sillcock that is winterized properly can last 20 years or more. A standard hose bib with a replaceable washer can last just as long if the washer is renewed every few years. Units made from lower-grade materials or those that have been left full of water through a hard freeze often fail within 5 to 10 years.
Can I install an outside water faucet myself?
Many homeowners can, especially if the existing pipe is accessible and they are comfortable with the connection method that matches it. Soldering copper takes practice, and any job that opens a wall or modifies a supply line is a reasonable place to call a licensed plumber, particularly where local code requires a permit.
Do I really need a frost-free sillcock if I live in a mild climate?
Not strictly. In climates that rarely see hard freezes, a standard hose bib works fine. The risk shows up during the occasional cold snap, when a forgotten hose or an open valve can still split a pipe.
Why does my outside faucet leak only when the hose is attached?
A small drip from the vacuum breaker or the packing nut often only shows up when there is back pressure from a closed hose-end valve. Tighten the packing nut, replace the vacuum breaker, and replace the end-of-hose washer if the drip is at the spout.
Is it okay to leave a hose splitter on year-round?
Leaving a splitter on is fine in warm weather, but the splitter should come off before freezing weather. With the splitter on, water can sit trapped in the sillcock stem and freeze, which is the same failure as leaving a hose attached.
What size supply line should run to an outside water faucet?
Most homes use a 1/2 inch branch line to a single hose bib. If the faucet serves a high-demand use like a pressure washer, a 3/4 inch branch can help with flow, but that is unusual for a residential setup.
Can an outside water faucet be moved to a different spot on the wall?
Yes, but it becomes a real plumbing job: a new hole through the wall, a new supply line, capping the old one, and patching the siding. For a one-time move, the cost is usually reasonable and worth it if the old location causes problems like a wet walkway or a hose that always kinks.
Why does my outside faucet make a loud hammering noise when I shut it off?
That is water hammer, and it comes from sudden pressure changes when the valve closes quickly. A quarter-turn valve is more likely to cause it than a multi-turn valve. Installing a small water hammer arrestor on the supply line near the faucet, or just closing the valve more slowly, usually solves it.
Should I cover my outside water faucet in winter even if it is frost-free?
An insulated cover on a frost-free sillcock is optional, not required. The seat lives inside the heated wall and the stem drains when the valve is closed and the hose is off, so the design already does the hard work. A cover adds a small amount of extra margin during a deep cold snap and is cheap insurance.
Leave a Reply